
Up until recently I have only been using my Juki MCS-1800 cover stitch machine for hems on knits and woven fabric garments. However, when I was gifted a binder attachment for my machine, my confidence with the cover stitch grew and I decided I wanted to explore what else I could do with it.
I had seen others attaching elastic with their cover stitch machines and thought I would look in to using it on my elasticated waistbands. My normal method would be to attach the elastic to the raw edge with my overlocker, then fold it over and use either a straight stitch or a narrow zigzag to keep it in place. This is a method I am happy with, I am confident doing and works well, apart from one little niggle – the gap between the edge and the top stitching. Yes I know it is a very minor issue, but the part of sewing I really enjoy is finding methods that produce a beautiful finish to my sewing. So, I decided to have a play and find what was my best method for finishing an elastic waistband with the cover stitch.

I had a think on how I should approach this and was initially concerned that just swapping my straight stitch/zigzag for the coverstitch would give me too much thread bulk. Two tried and tested methods for attaching elastic to the edge of fabric is using a narrow zigzag or a triple zig zag. As I wanted a slightly wider area of attachment I tested out the triple zig zag.

This was ok but the triple zigzag was hard to keep straight when pulling the elastic and difficult to keep the stitching on the edge. This meant that the stitches were not fully covered by the cover stitch and also the stitch produced little folds of fabric which were poking through. I was sure I could do better so decided instead of assuming, I would use the overlocker and see what stitch bulk was produced.

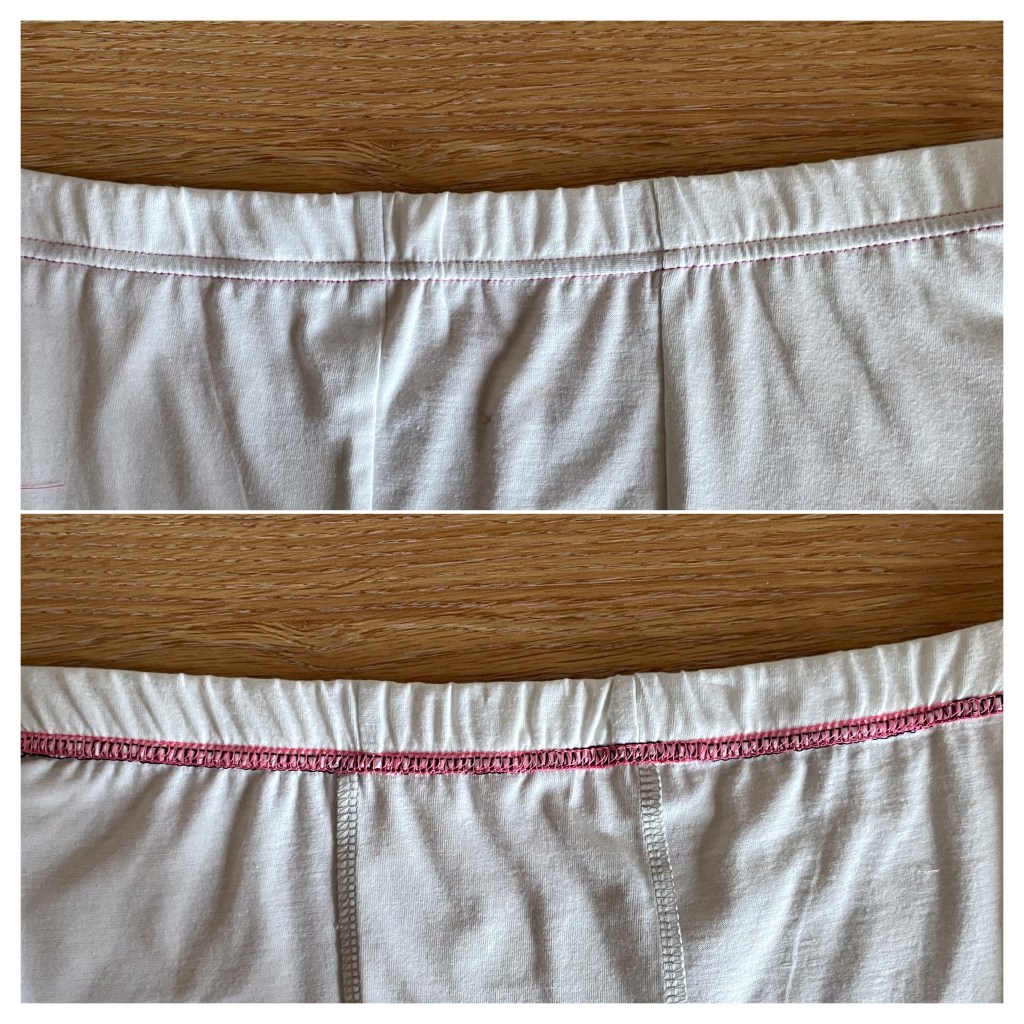
I was a lot happier with the finish using the overlocker except that the stitches were still above the cover stitch and the mass of stitches that resulted from both rows when the elastic relaxed.
The solution to this was simple, do a narrow/single needle over lock and then cover stitch with both the overlocker and coverstitch set to a long stitch length.
As one row of the cover stitch will be over the elastic there will still be two rows of sewing attaching the elastic to the garment so the stability of the waistband will still be maintained.
As I change and improve my sewing methods I have a tendency to forget some of the more minor steps that actually make a big difference to the final garment. So I have started writing myself crib sheets to help me to remember all the steps. Here is my step by step crib sheet for this technique with added notes and images to explain why (I will add a crib sheet only at the end if you wish to copy and print for yourself).
Attaching elastic to create a waistband with a cover stitch machine.
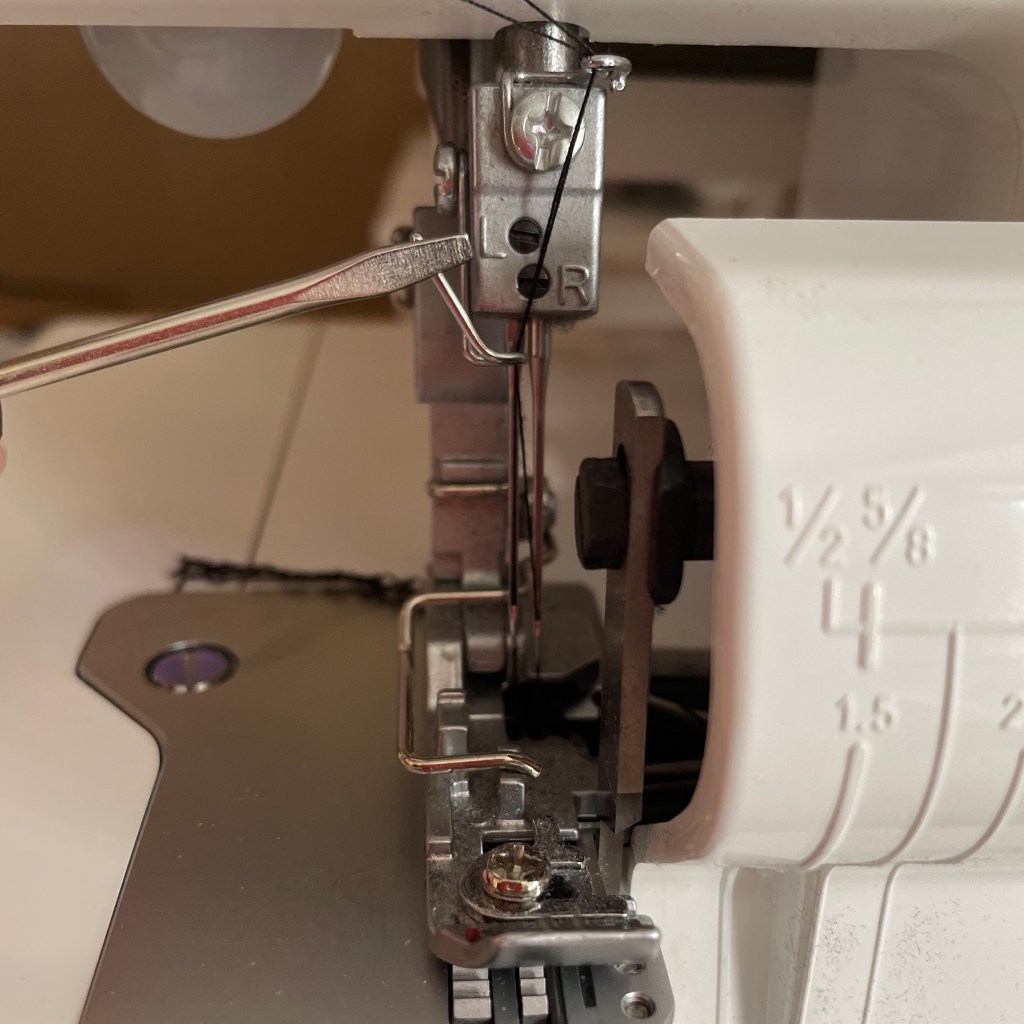
- Remove the left hand needle on your overlocker – you need to sew a narrow overlock stitch so that the stitch line will not be visible above the cover stitch row.
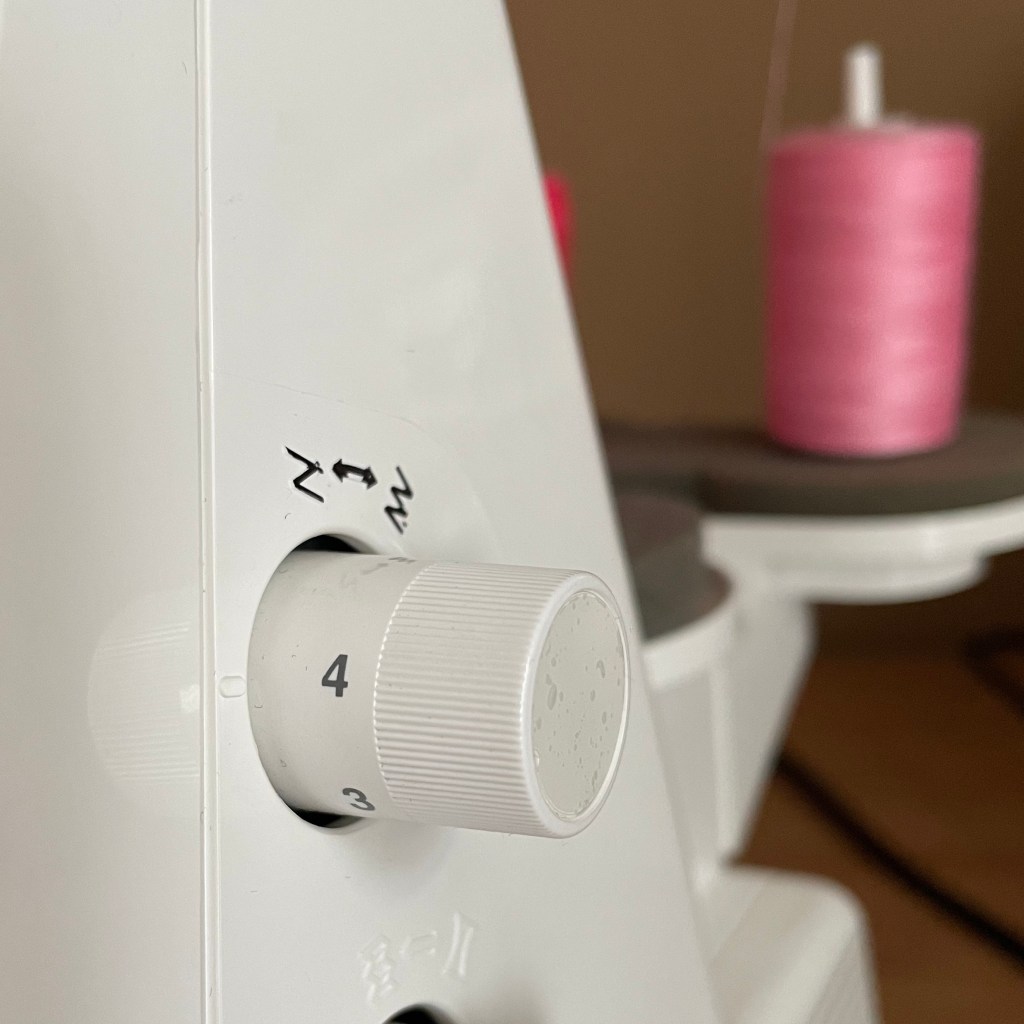
- Increase the stitch length of the overlocker – as you are stretching the elastic as you stitch, if you do not increase the stitch length the stitches will be very congested when the elastic relaxes.
- Prepare the garment by basting all seams in the opposite direction to their finished position – for example, if your side seams will be pressed to the back in the finished garment baste the seams to the front.

- Attach the elastic to the waist edge
- Snip the seam allowances where the seam folds over the elastic and fold back to its original direction– this will mean you will have two single not one double thickness of seam allowance when the waistband is folded over.

- Fold the elastic over and pin in place, pin heads up and over the edge – you place the pin heads up and over the edge as it is easier to pin on the wrong side but as you will be sewing from the right side they will still be visible and easy to remove as you are sewing.

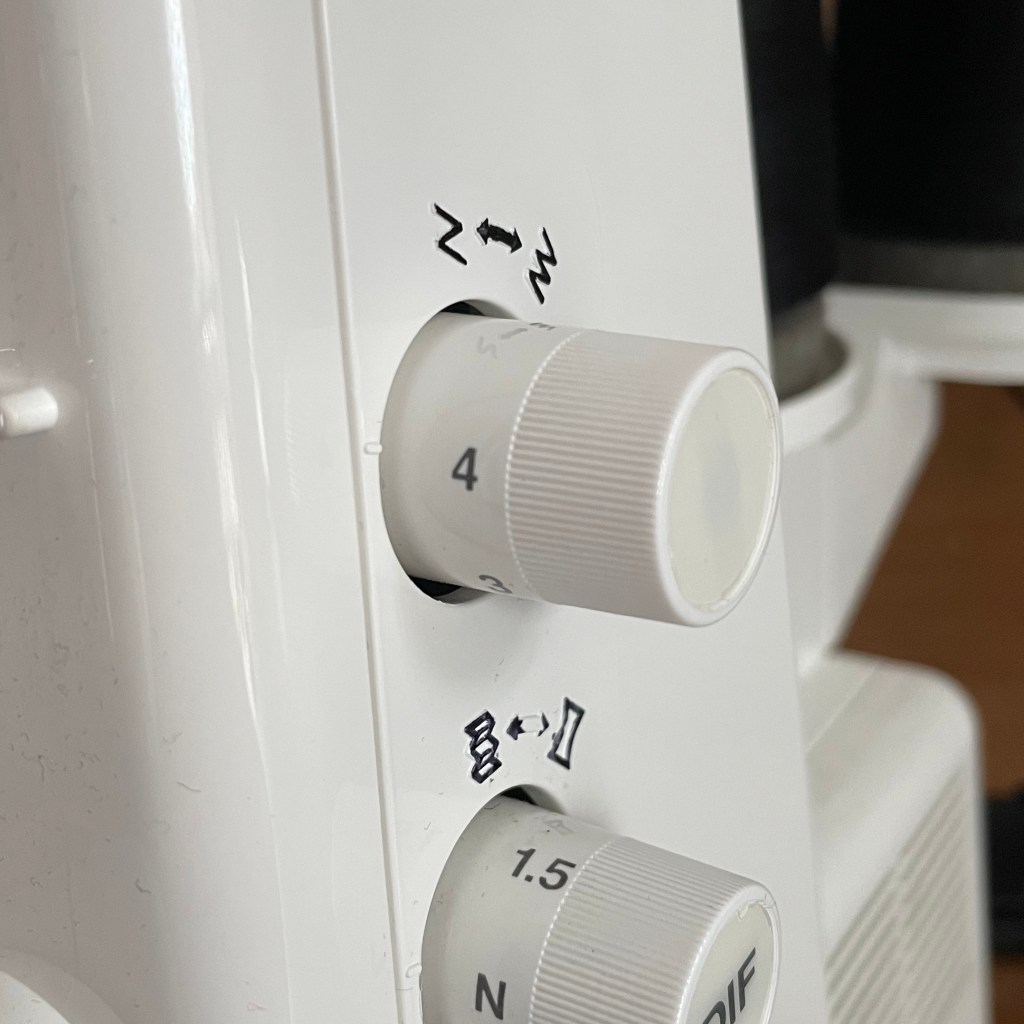
- Increase the stitch length on the cover stitch machine – this is for the same reason as when overlocking, as you are stretching the elastic as you stitch, if you do not increase the stitch length the stitches will be very congested when the elastic relaxes.
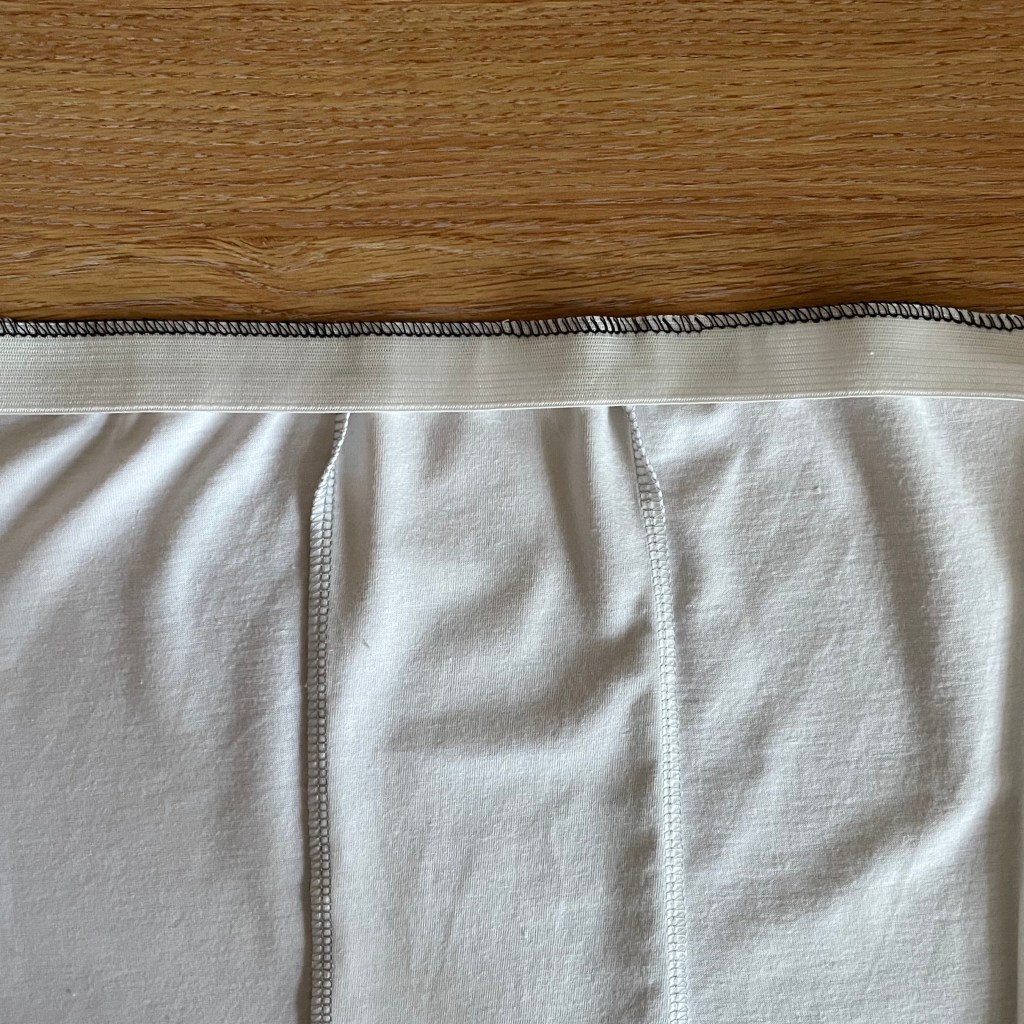
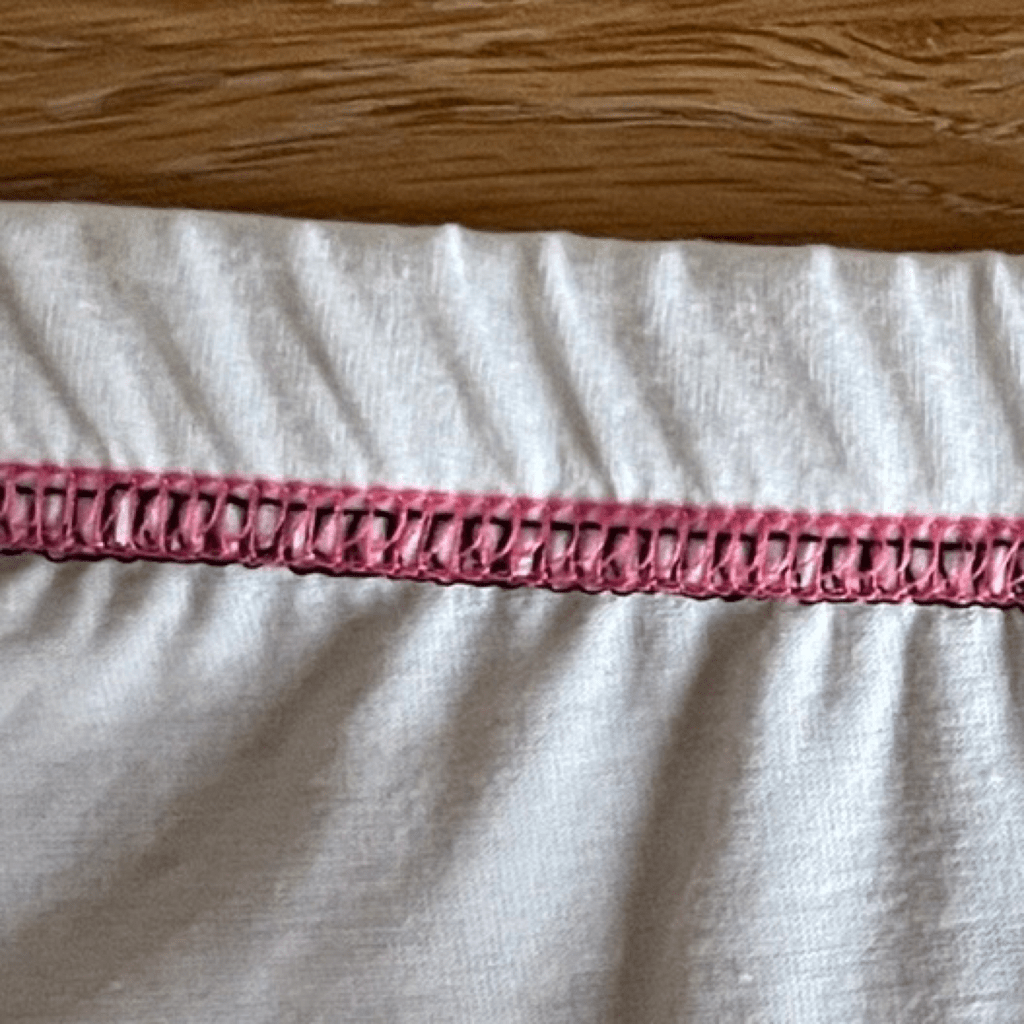
- Cover stitch the elastic in place – ensure the left needle will stitch just over the edge of the elastic. This will ensure the edge will be completely encased.


So there it is, my method for attaching elastic to create a waistband using a cover stitch machine. I hope this technique is useful for you and helps you to increase the usefulness of your cover stitch machine.
Crib sheet:
Attaching elastic to create a waistband with a cover stitch machine.
- Remove the left hand needle on your overlocker
- Increase the stitch length of the overlocker
- Prepare the garment waist by basting all seams in the opposite direction to their finished position
- Attach the elastic to the waist
- Snip the seam allowances where the elastic folds and fold back to original direction
- Fold the elastic over and pin in place, pin heads up
- Set the cover stitch machine and increase the stitch length
- Cover stitch the waistband down

Good technique well explained. I particularly like the next to last section with the photos and accompanying text. You should write a book!
LikeLike
Thank you Janet, I have started putting crib sheets on the wall by my machines so thought others may appreciate them too. A book, now there’s a thought. 😁
LikeLike
Wonderful explanation congratulations
LikeLike
Thank you, I hope you find it useful.
LikeLike
Yes you should write a book
LikeLike
Winter is on its way so you never know 😁
LikeLike