
The fabric is all sewn together, gusset and all, and the next stage is what some people consider the most complicated step. I am hoping that part 3 of my knicker making mini series will dispel all fear and you, like me, will LOVE fold over elastic. I am continuing to use the Megan Nielsen Acicia pattern and sewing on a standard sewing machine.
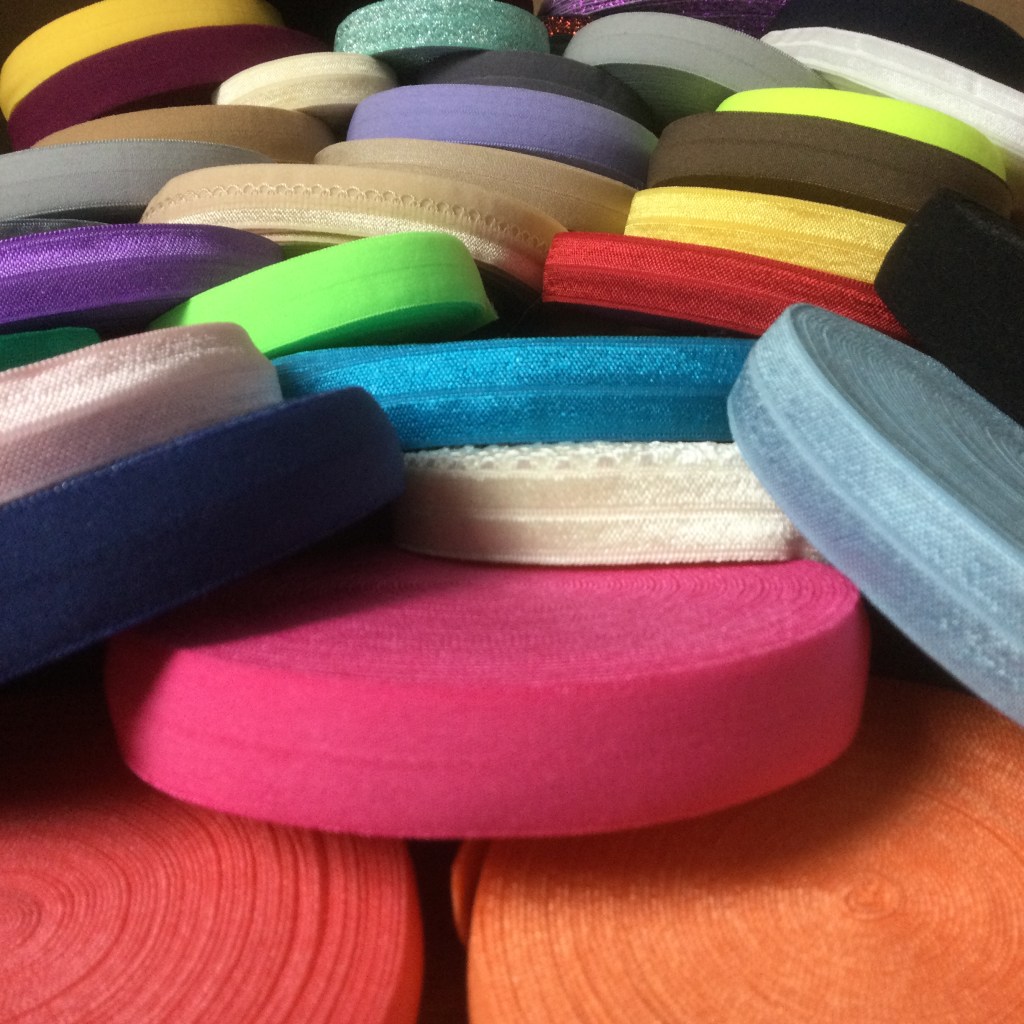
I first wrote about attaching FOE (Fold Over Elastic) to knickers in a blog for the Juki Club last year. I have not changed my mind about this being my favourite method but have picked up a few extra hints and tips since then. If you are interested in beautiful content, amazing quilts, a blog or two from members of my Bee family and information on the various Juki machines available, the Juki Club website is well worth a visit.
There are a lot of methods on-line on how to attach FOE but I was looking for a consistent and visually pleasing method for my knickers. I started with the simplest method, folding the elastic so it encased the raw edge and attaching with a triple zig-zag. I found this a little fiddly and occasionally with the shaping of the leg opening I managed to completely miss the fabric and was left with a hole and a lot of unpicking. I had also seen a recommendation to baste the FOE to the fabric first, but that did not appeal as it is fiddly and I found it difficult to get an even stretch of the elastic. The final method I looked at was the “Two step method”. In this method the elastic is first sewn to the fabric unfolded, and then folded over and sewn again.
This method seemed to give me the control and consistency I was looking for but the methods I saw demonstrated were, to me, a bit messy and untidy. After a couple of tries I finally settled on a way of doing the Two Step Method that I was happy with and I could reproduce over and over again. This method attaches the fabric to the outer edge of the FOE using a narrow zig-zag and then folding the elastic over and finishing with a wider triple zig-zag.
My take on this method uses a sewing gadget that I never thought I would use in a million years, and that is a seam guide. However, I need to make a technical point here and that is Do Not Use a magnetic seam guide on any computerised or electronic sewing machine. The magnet and the electronics do not get on well with each other and the electronics may be damaged. As an alternative I found a great suggestion on line to use a wad of Post-it notes. There are some very clever inventive people out there.

The reason for the seam guide is that for the first pass of the elastic you need to keep your eye on two things simultaneously. Firstly, you need to keep the FOE in position so that the stitching is close to the edge. The edge, however, is hidden by the fabric so you can’t see it. This is where I find the seam guide is invaluable. Instead of keeping an eye on the foot plate, the seam guide is a physical presence past which the FOE cannot go. You can, within reason, completely forget about the position of the elastic and concentrate on the second thing, the position of the fabric. To ensure an even edge and a smooth fold, the fabric needs to stay to the left of the FOE centre line. To control this I keep an eye on the centre line and use a point on the foot as my point of reference and try to keep my fabric on that point.
As a starting point I cut my FOE 90% of the length of the edge I am covering. From this length I will use around 1cm overlap at each end, which helps the feed dogs grip the FOE at the beginning and gives you something to hold on to at the end. Before cutting any elastic always give it a good stretch before you measure it. Try this out for yourself. Mark off 50cm of elastic straight from the roll, give the elastic a good stretch, measure the elastic again. Your elastic will now measure more than your original 50cm, I find with my FOE that it will be around 52cm. My advice is to always stretch and measure each piece of elastic before you cut, never cut a length by comparing it to a pre cut piece.
You may find that for your elastic or garment that 90% is not the best percentage, for example if using this technique for children’s leotards where a tighter grip around the leg is preferred. As with everything it is always best to do a test first to make sure you are happy with the results.

These are my 80%/90%/100% knickers (not the Acicia pattern) which help to demonstrate what the difference in the % used can make. The actual difference between each length of FOE is only 6cm. Can you guess which is which?
(Right leg 80%, Waist 90%, Left leg 100%)

After the FOE is cut, mark the centre point and also the centre of the leg opening and pin together.
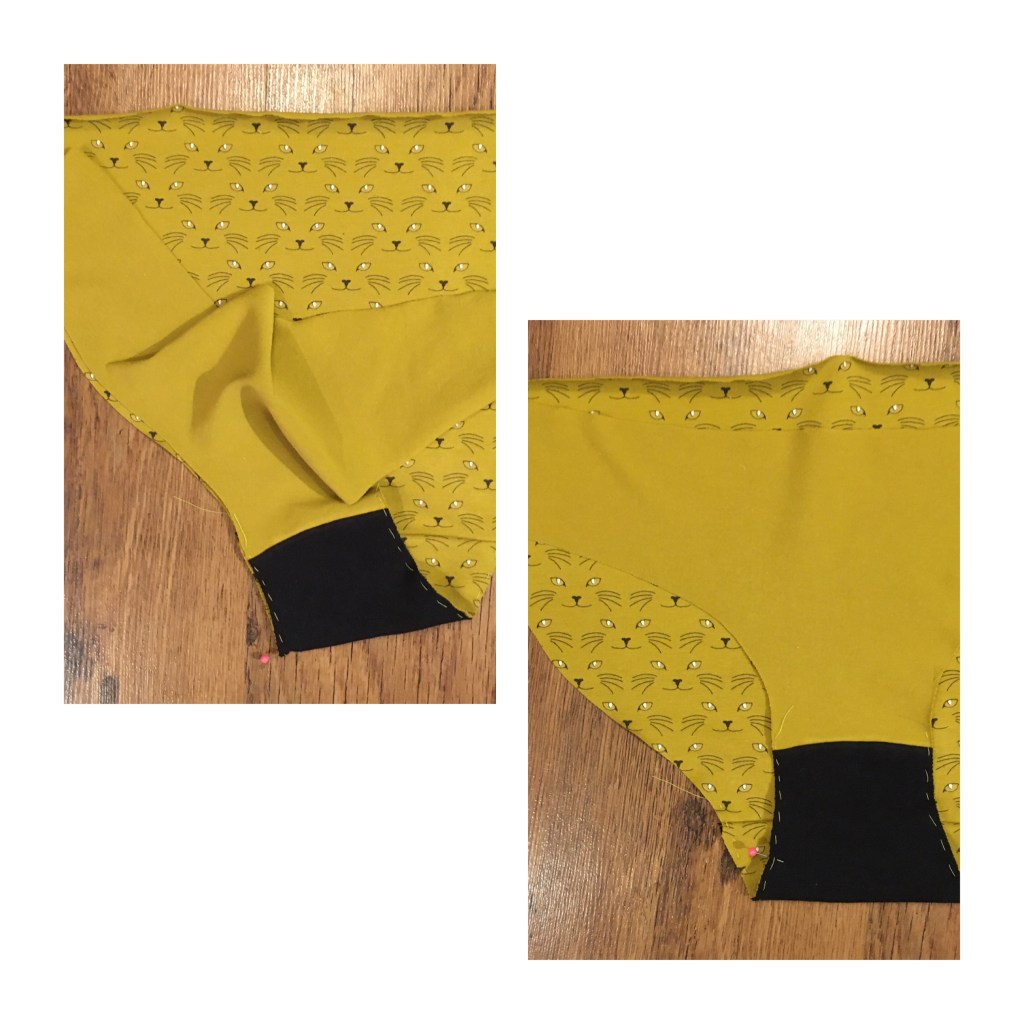
It is important that you walk the edges together to find the centre of the leg edge and not just fold the knickers in half as there is likely to be a slight difference in its position. This will ensure an even distribution of the elastic along the edge. In the top picture the edges have been walked together to find the center. In the bottom picture the pin marks the actual centre of the leg compared to when the knickers are just folded.
Lets go through this in more detail and to help you see the stiching I have used a contrasting thread. When you sew using a matching thread the stitches will be virtually invisible. Also, in theory, I should be able to produce a table of stitch widths and lengths for standard widths of FOE, but I like to do my settings from scratch each time I make a garment so it keeps things fresh in my mind. I also like to check I have set my stitch width and length correctly before I start sewing. So my first step is always to check my settings on a spare piece of FOE.
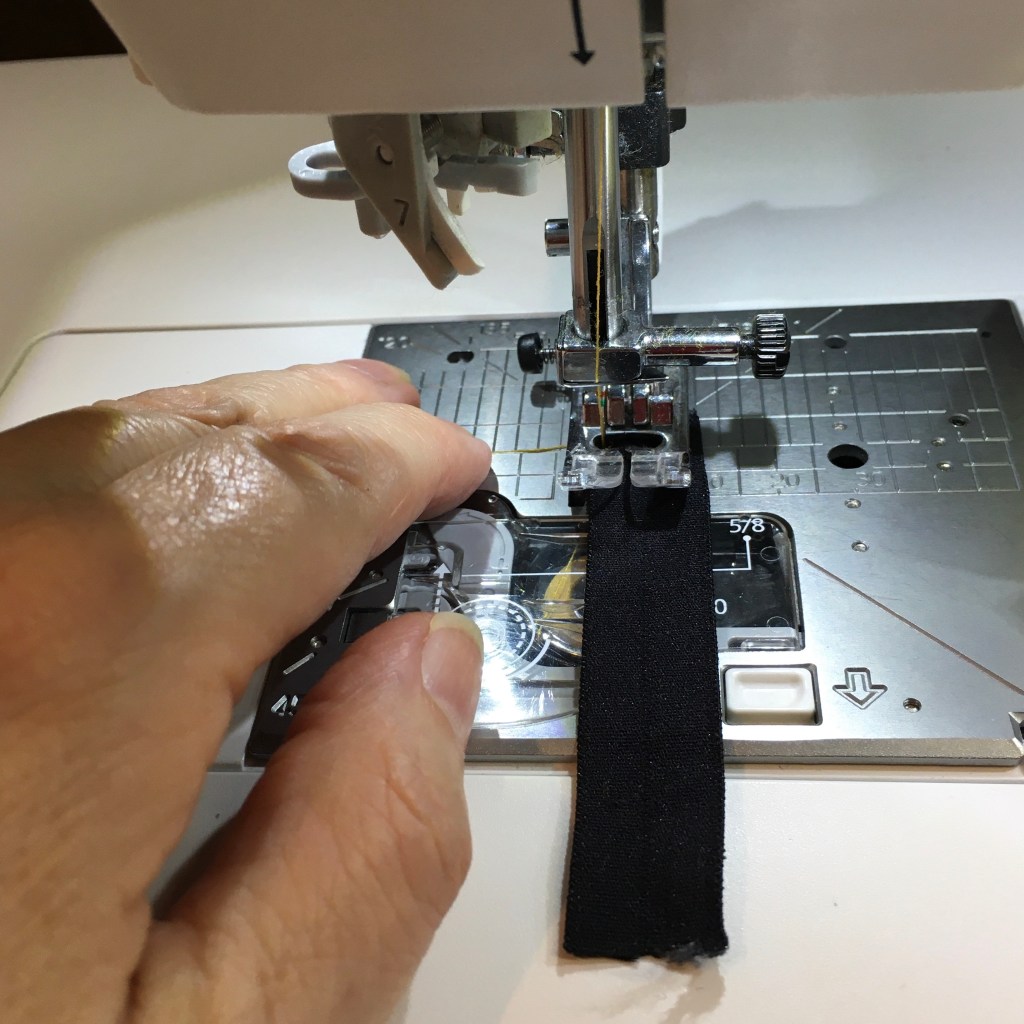
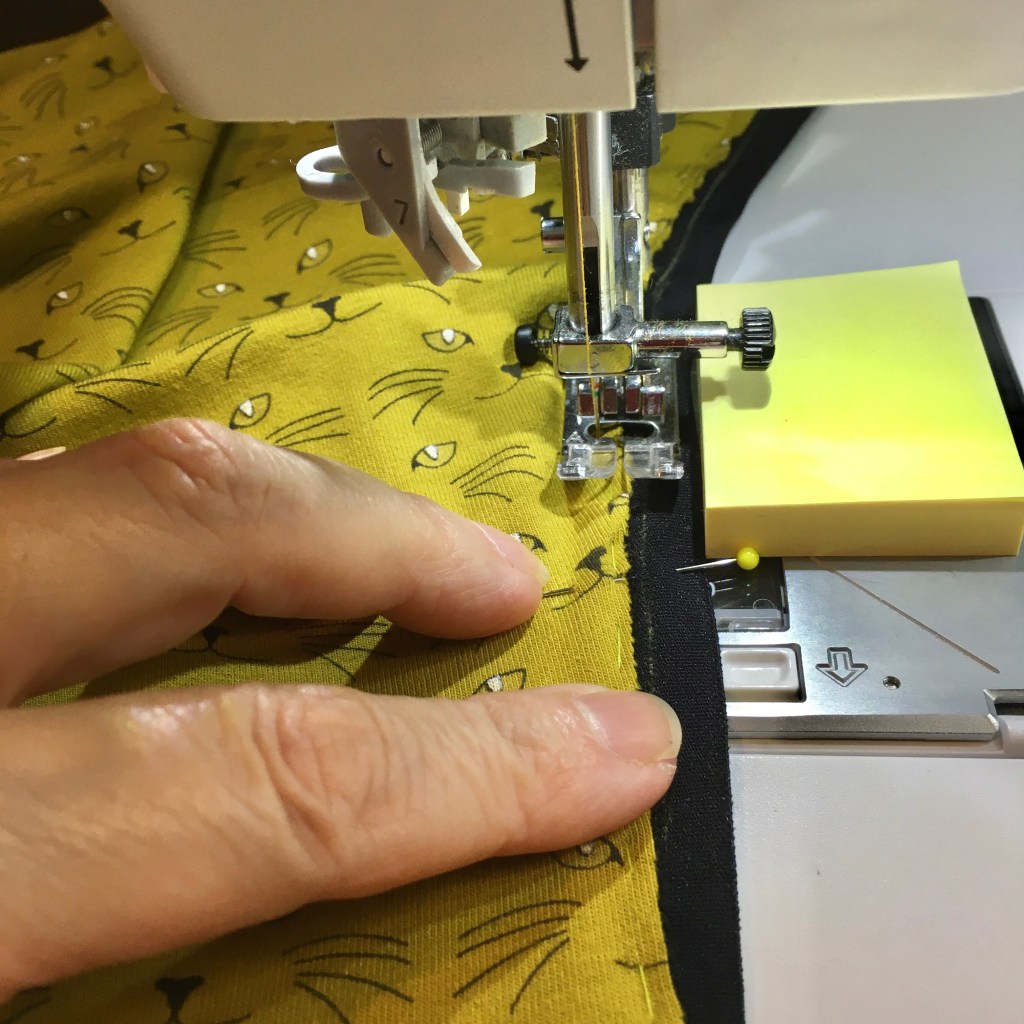
For the first row of zig-zag I use stitch #15 on my Juki NX7 which is the zig-zag left needle position. I prefer this to the centre orientated one as it means that more of the FOE is in contact with the feed dogs. This is important to ensure an even stitch as you will be stretching the FOE to match the length of the fabric. One important thing to note here is that I do not use my Juki Smart Feed/Walking foot when sewing on the FOE. Pulling the fabric to the front while the machine is pulling the fabric to the back causes stitch issues. I like to use a narrow short stitch to ensure there is some stretch in the finished seam. Start with a 1.2 width and 1.4 length to see how it looks and stretches. Place your spare piece of FOE under the foot, partly lower the needle for reference and move the elastic so the stitch line is close to the edge.
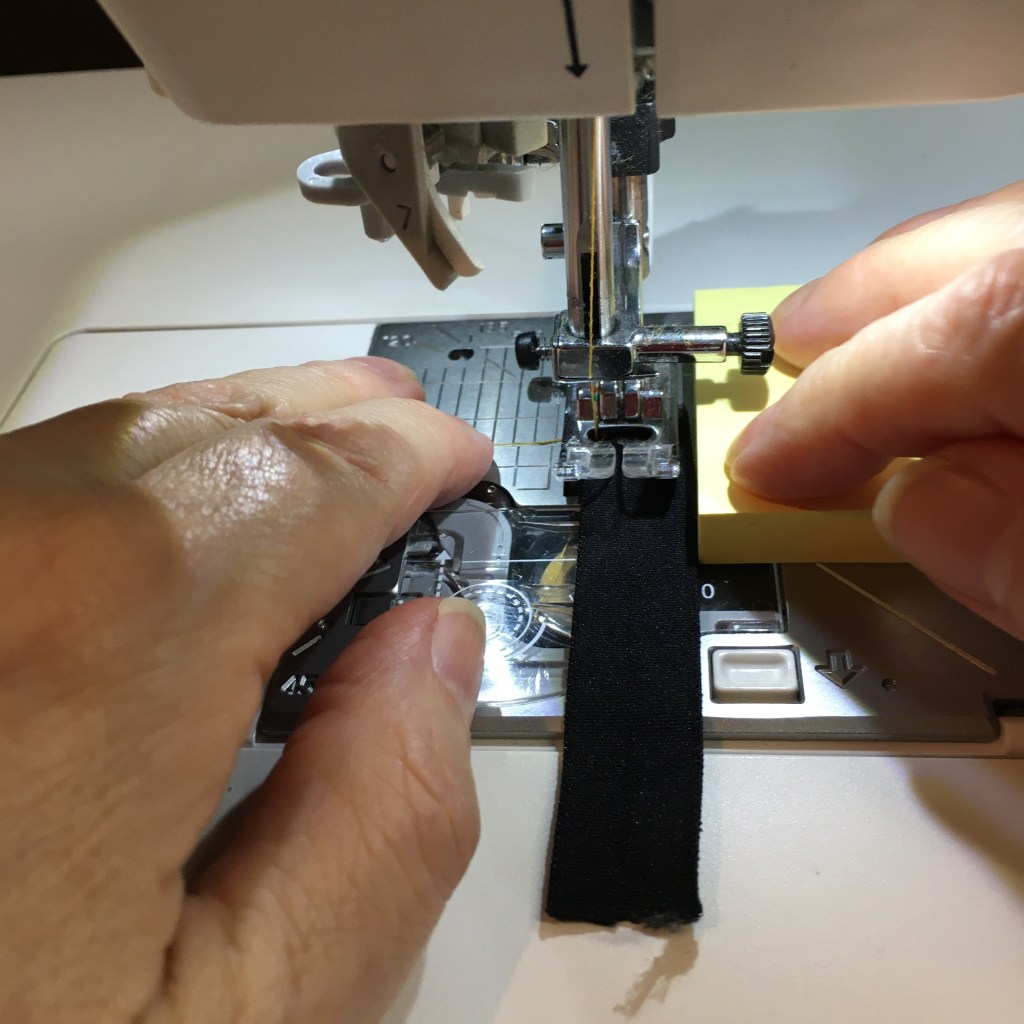
Lower the foot and position your seam guide.
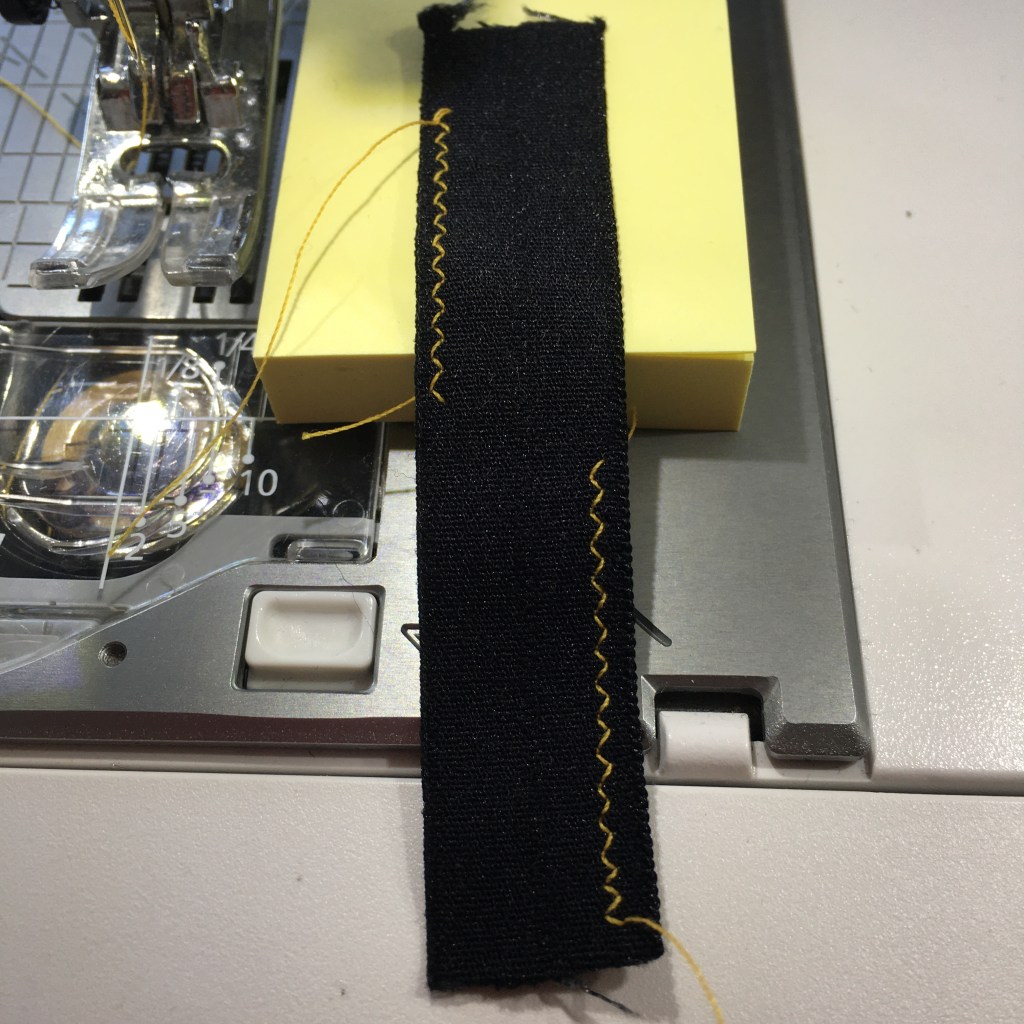
Do a quick test of the stitch to ensure you are happy with the position and size of the stitch. Having made a few pairs now I have come to realise that the position of the stitch on the FOE is important. If the stitching is too far away from the edge then there is a chance that the edge will roll over on itself. On the other hand I did manage to get the zig zag stitch right on the edge of the elastic for one pair of knickers I was making. It looked so good, until that is I folded the FOE in half and the stitches could be seen on the right side. So, I think that the best position for the stitching is close to the edge but not on it, as in the position of the stitching on the left in the picture above.
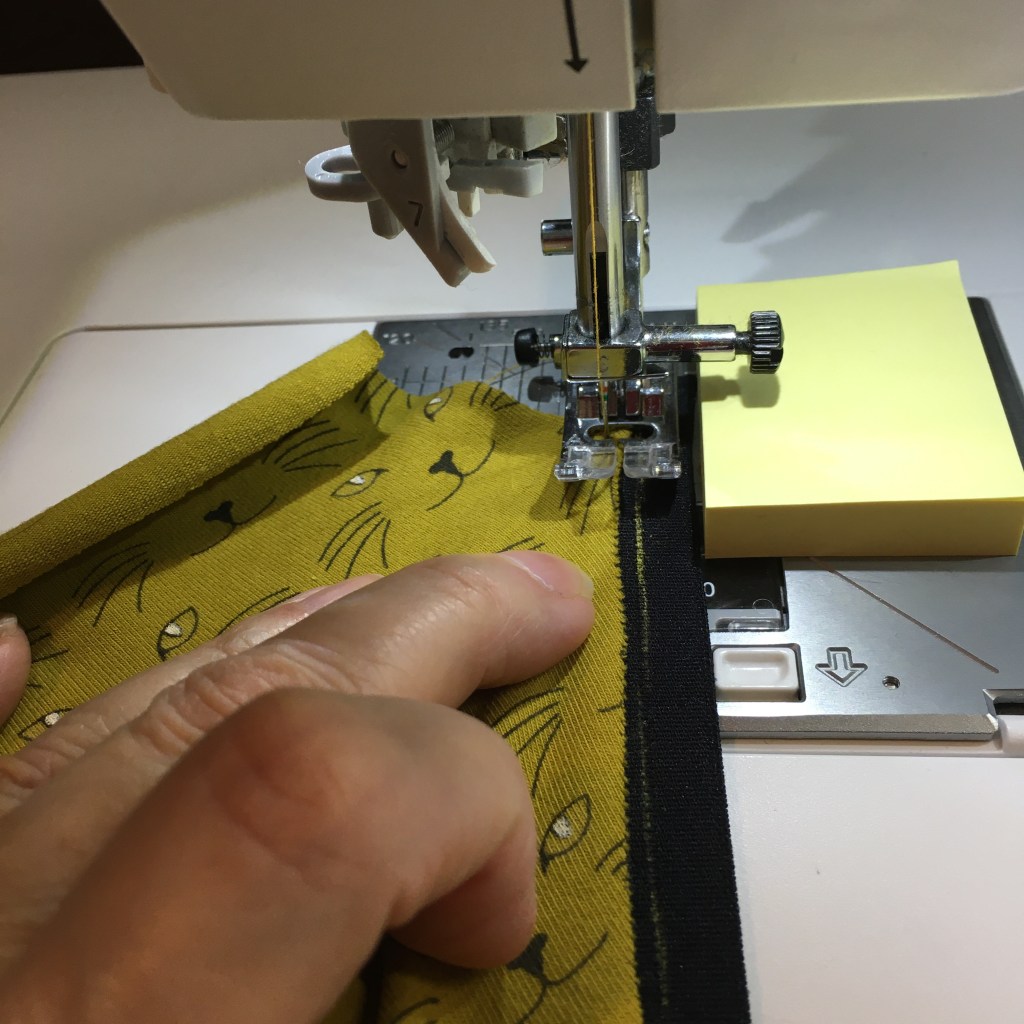
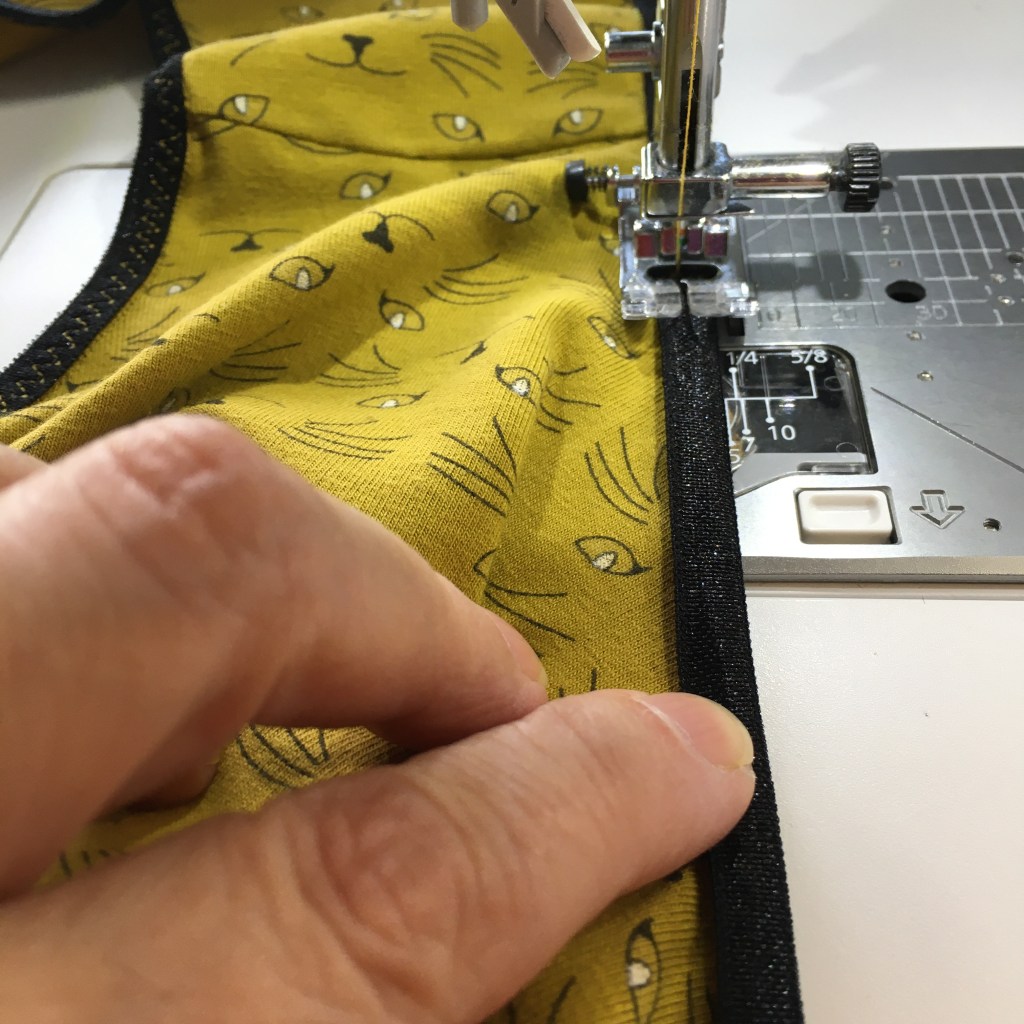
With the position of the FOE set next you need to establish the position of the fabric. This is where the extra cm of FOE at the beginning is useful. Start sewing the elastic without the fabric in place, only a couple of stitches are necessary to start with. This allows you to confirm that the seam guide is in the correct position and that the stitches are along the edge and not too far in or off the elastic. Also with a couple of stitches in the elastic and the needle down it is secure while you position the fabric.
A point to note – some FOE does not have a very visable centre line. You may want to avoid these, or as I do, mark the centre line in chalk.
Position the fabric just to the left of the centre line and note the position against the foot. Also, a thing to note that is a bit of a counter intuitive issue is that you work with the fabric right side up. I cannot tell you how many times I have had to unpick a row of stitching, yes even the pair I am making for this blog, as I have gone in to auto mode and sewn on the elastic on with the fabric face down. UPDATE: The penny finally dropped after I posted this blog and it really doesn’t matter which way round the fabric is. Firstly, they are your knickers and you sew them how you want to. Secondly, when sewn in a thread that matches your elastic you will be hard pushed to notice anyway. Try to keep the fabric on this line while sewing, though a few millimetres either way while will not be noticeable on the finished garment. Start sewing without exerting any pull on the FOE until you have two or three stitches attaching the fabric to the FOE.
Now that the elastic and fabric are secure you are ready to sew. Sewing a curved piece of fabric to a stretched, straight piece of elastic can be problematical. Some machines, when pulling against the feed dogs to stretch the elastic, may need you to pull from behind to get an even consistent stitch. This would mean both your hands would be busy and you would have no control on the fabric itself. If this is the case on your machine you will need to pin the elastic and fabric along the length of the leg before starting to sew. This will make the process slightly slower but will produce the same outcome.
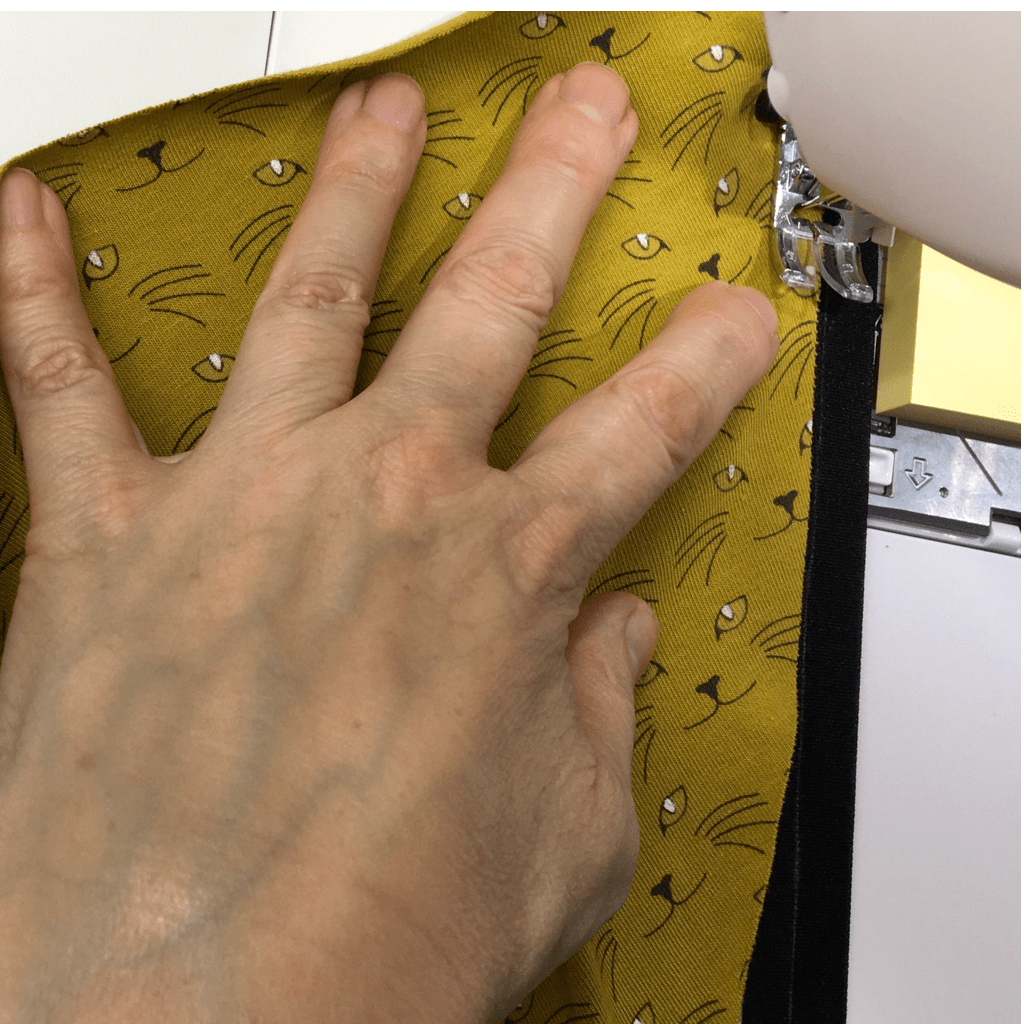
If your machine is sturdy enough to be able to deal with the pressure on the elastic you will be able to hold the fabric and the stretched FOE in one hand and manipulate the curve of the fabric up to the centre line with the other while the feed dogs pull the fabric through.
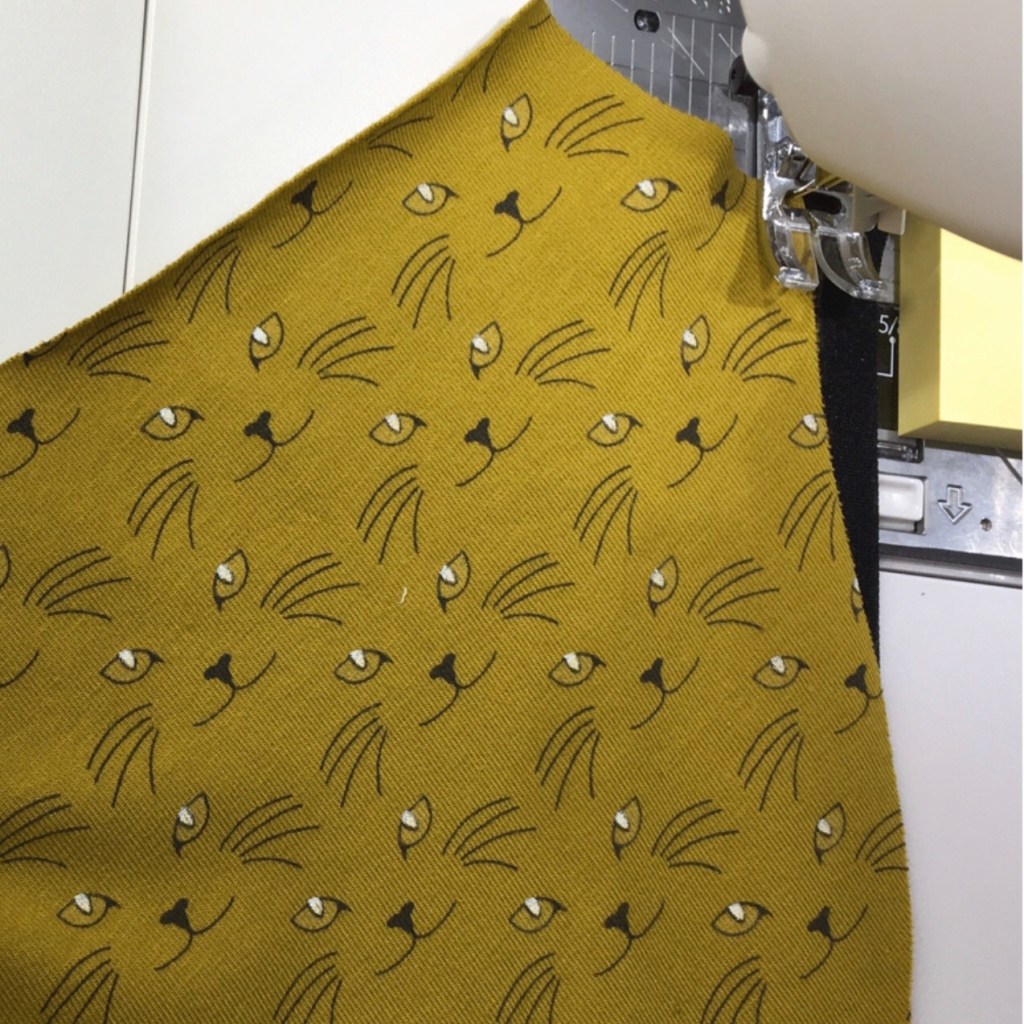
Stretching the fabric to the centre mark.
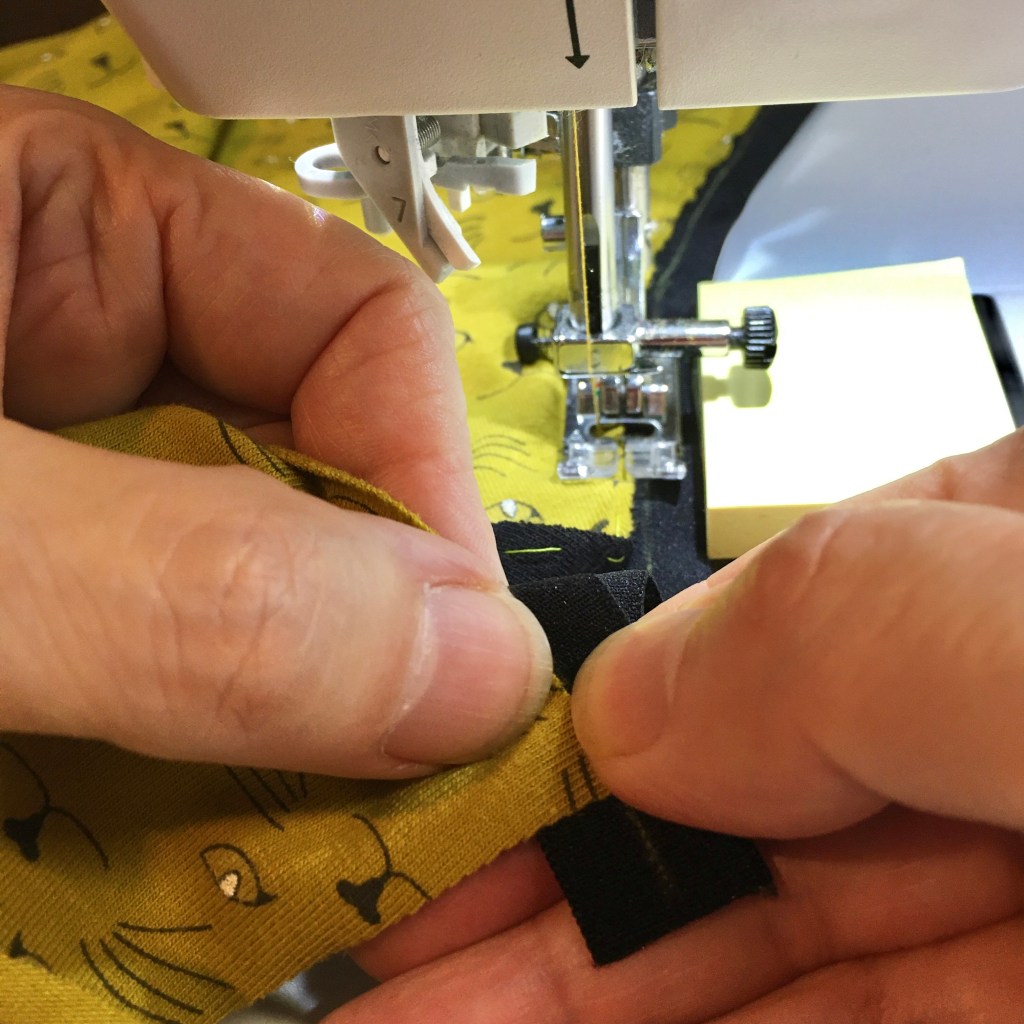
When you have passed the centre point stretch the remaining elastic so there is a 1cm overlap at the end of the fabric, this gives you a little bit of the elastic to hold on to when you get near the end of the seam.

The FOE attached to the leg opening (wrong side).
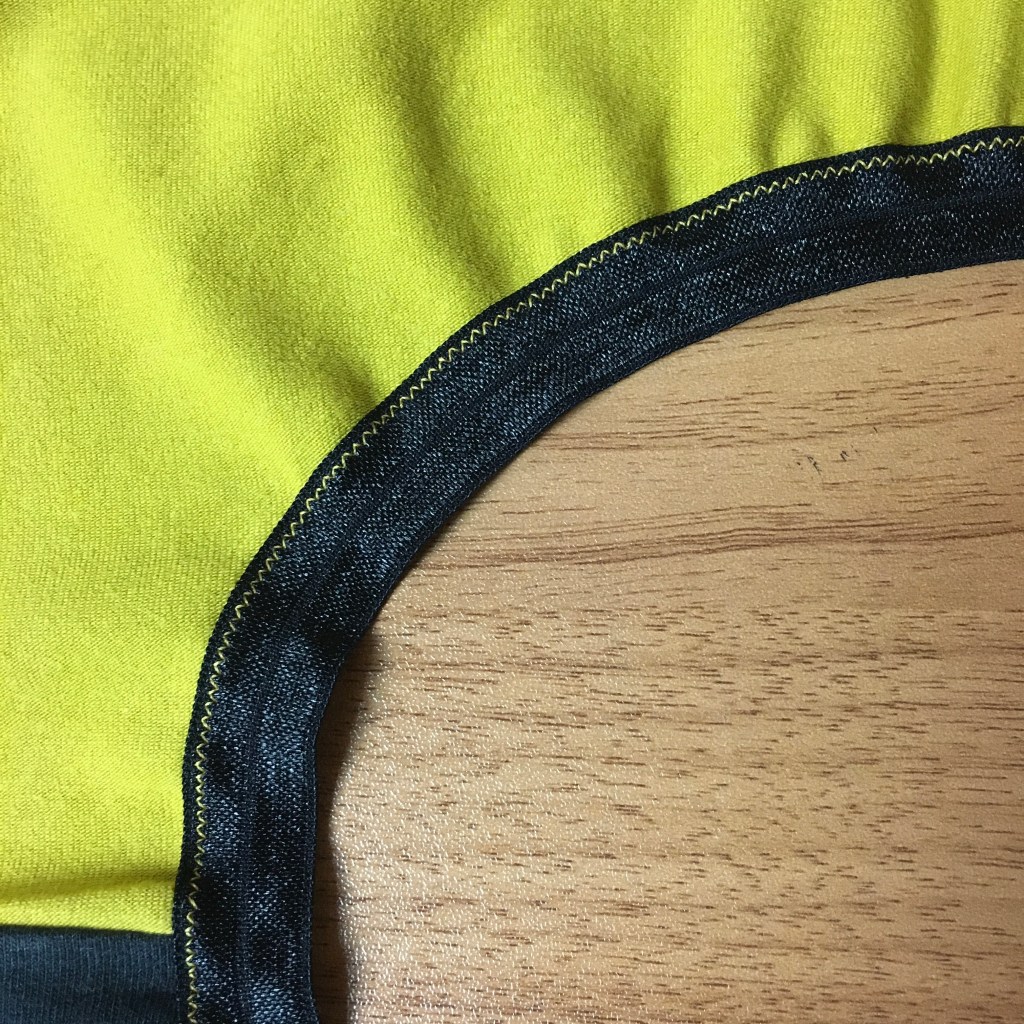
The stiching on the edge of the elastic.
Now that the fabric and elastic are attached you need to set up for the second pass, folding the elastic in half. For this a 3 step zig-zag is used and on the Juki NX7 that is stitch #20. I like to use a stitch width that is around 1/2 of the folded elastic width, to give me a little wobble room, and a medium length, as I am not too keen on the look of a long stitch. Remember this seam will be sewn with the elastic stretched so when relaxed the stitches will look slightly closer together. For a 15mm FOE start with a 3.4 width and 1.0 length to see how it looks. Place your spare piece of FOE under the foot, partly lower the needle as a guide and move the elastic so the stitch line is close to the left edge of the folded elastic. Note where the edge comes to on the foot/throat plate and that will be your guide line. Do a test to ensure you are happy with your choice of position, length and width of stitch.
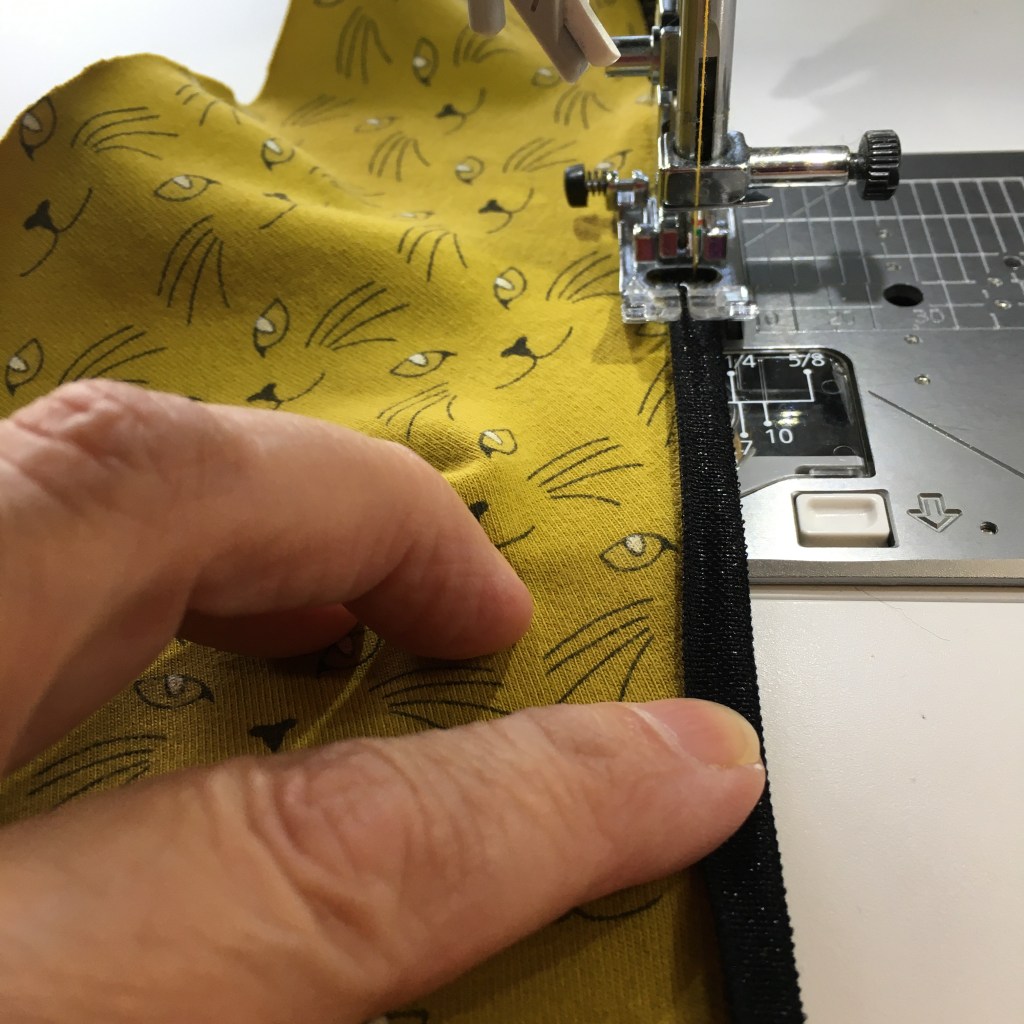
As with all sewing the reduction of bulk is very important so, before you start sewing trim the seam allowance down close to the stitch line at the gusset seams. This will also ensure the even fold of the FOE. The extra elastic at the beginning will allow the feed dogs to grip and feed the elastic through evenly . Make 2 or 3 stitches in to the fabric before stretching the elastic and sewing the leg seam.
Ideally you should be stretching the elastic only enough for the fabric to be flat not stretched, the three step zig-zag will allow the finished seam to stretch further if needed. Once again you may want to pin the FOE in place if you have issues with pulling against the feed dogs instead of folding the elastic as you go.

And there you have it one smooth and even Fold Over Elastic leg opening.

And as I said at the beginning, using matching thread means the stitching is almost invisible.
Next up: The side seams.

This looks wonderfully detailed and relatively easy to accomplish, Mercedes. Again, HUGE Thank You!!!
Am a bit off beam after Wednesday’s desecration – like waiting for the other shoe to drop. Will come back to this when things are more settled. xx
LikeLiked by 1 person
Thank you again. Hope you get back on that beam soon. It will be there waiting for you when you are ready xx
LikeLiked by 1 person
💕
LikeLiked by 1 person