
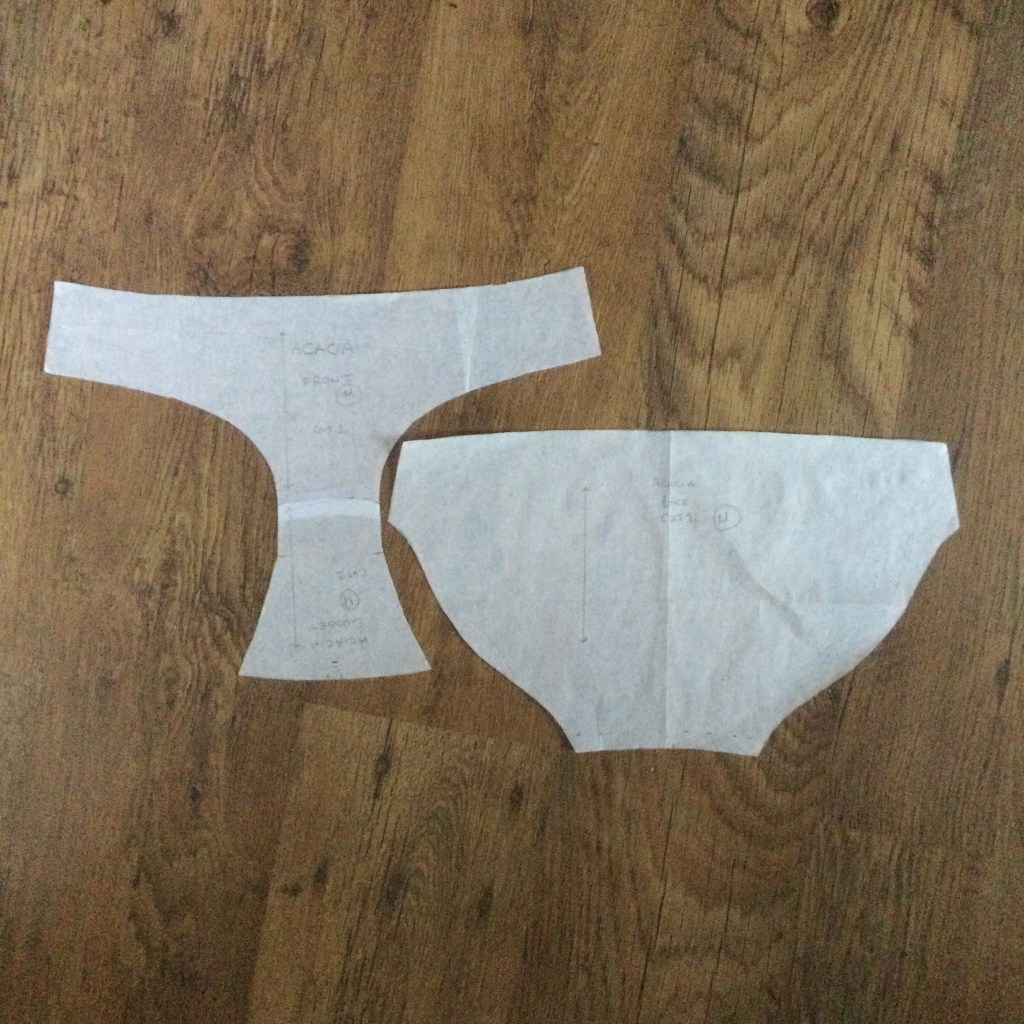
I have been having a great time recently playing about with knickers. I have been wanting to understand more about their construction for a while and finally got to a point where there were no urgent big projects on my list, so I could sit down and play. Lots of you have been very kind with your comments when I have posted my attempts on Instagram, so here as promised is part 2 of my blog on knicker making, The Gusset. As I said in part 1, I will be using the Megan Nielsen Acicia pattern and sewing on a standard sewing machine. However, I will also show you when an overlocker can be used if you would like to use one.
I have two methods of adding a gusset, the first is using the burrito method, which gives you fully enclosed seams. The second is the single seam method and uses a larger piece of fabric, with the gusset cut as one piece with either the front or the back. Though for this method I do use an overlocker.
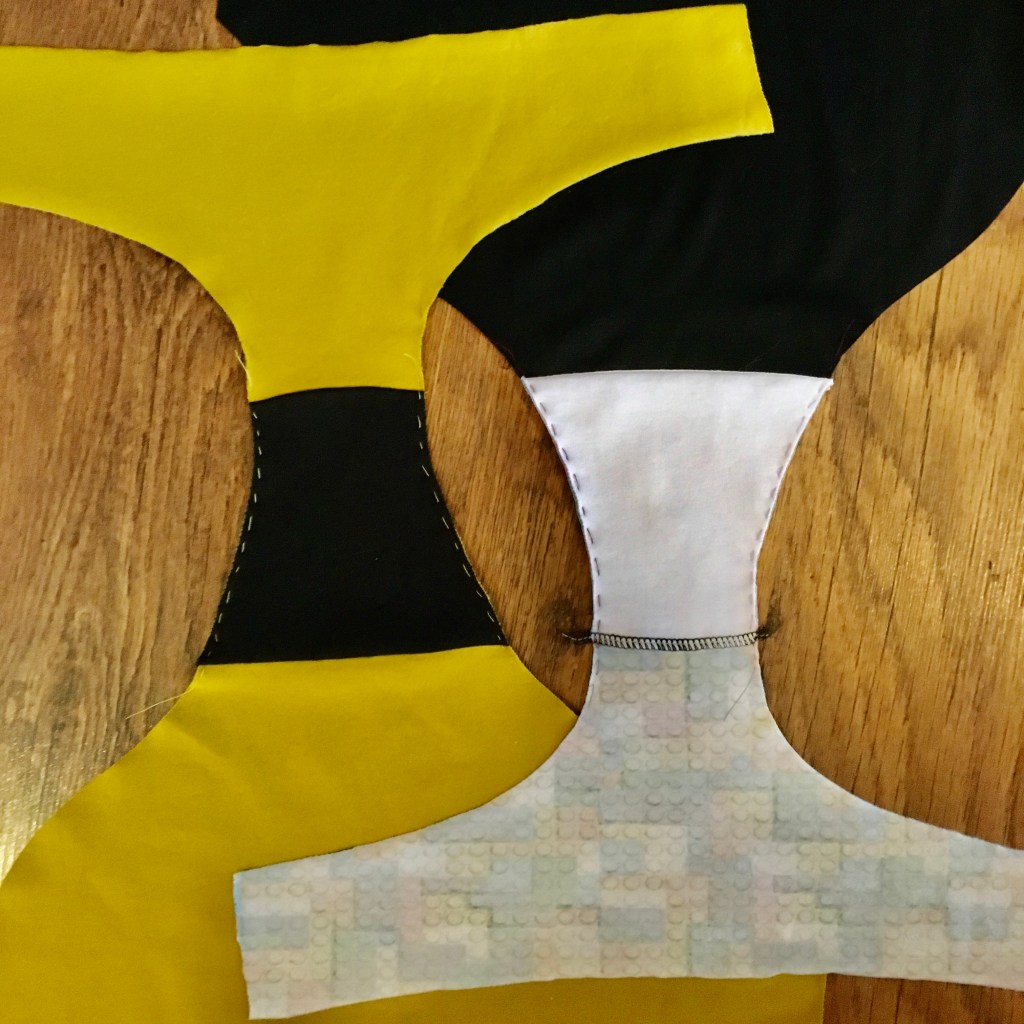
Adding a gusset using the burrito method
My method is slightly different from other methods I have seen as I only do 2 seams instead of 4.
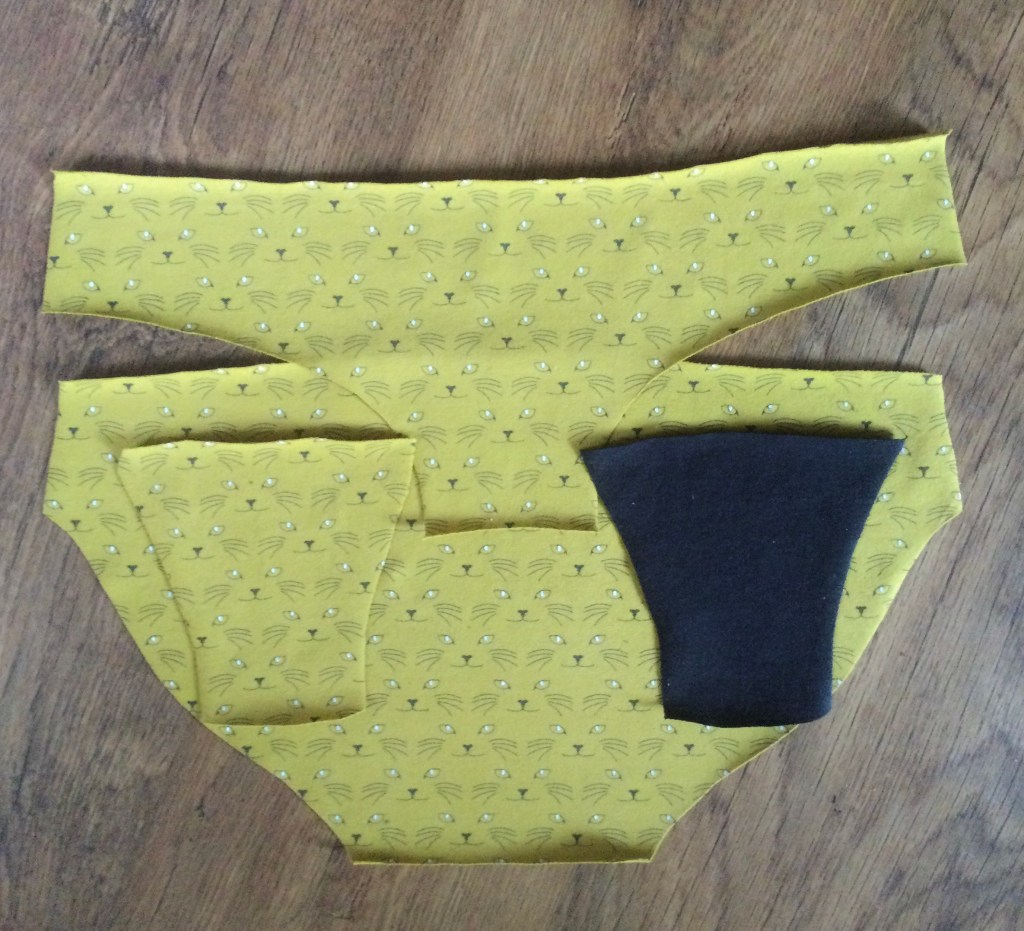
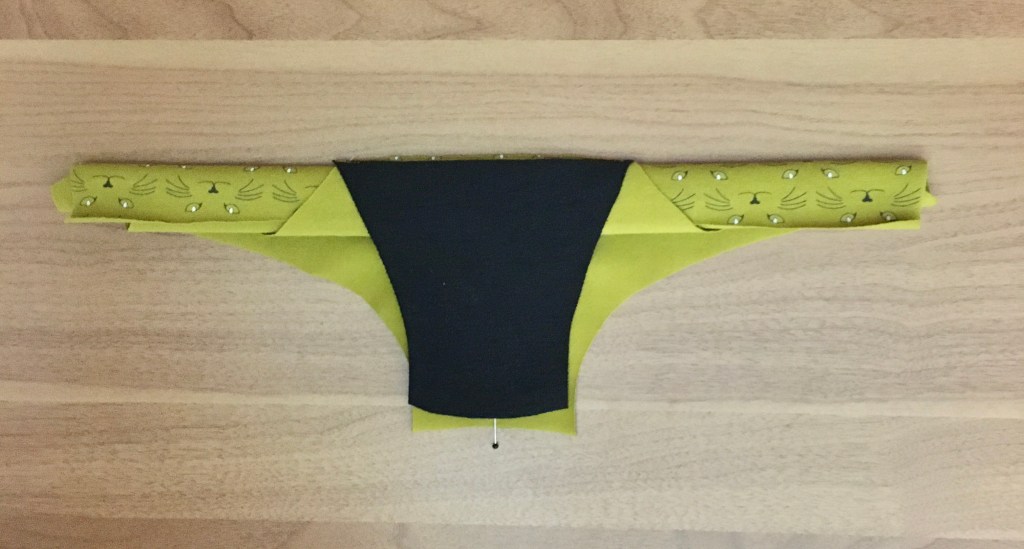
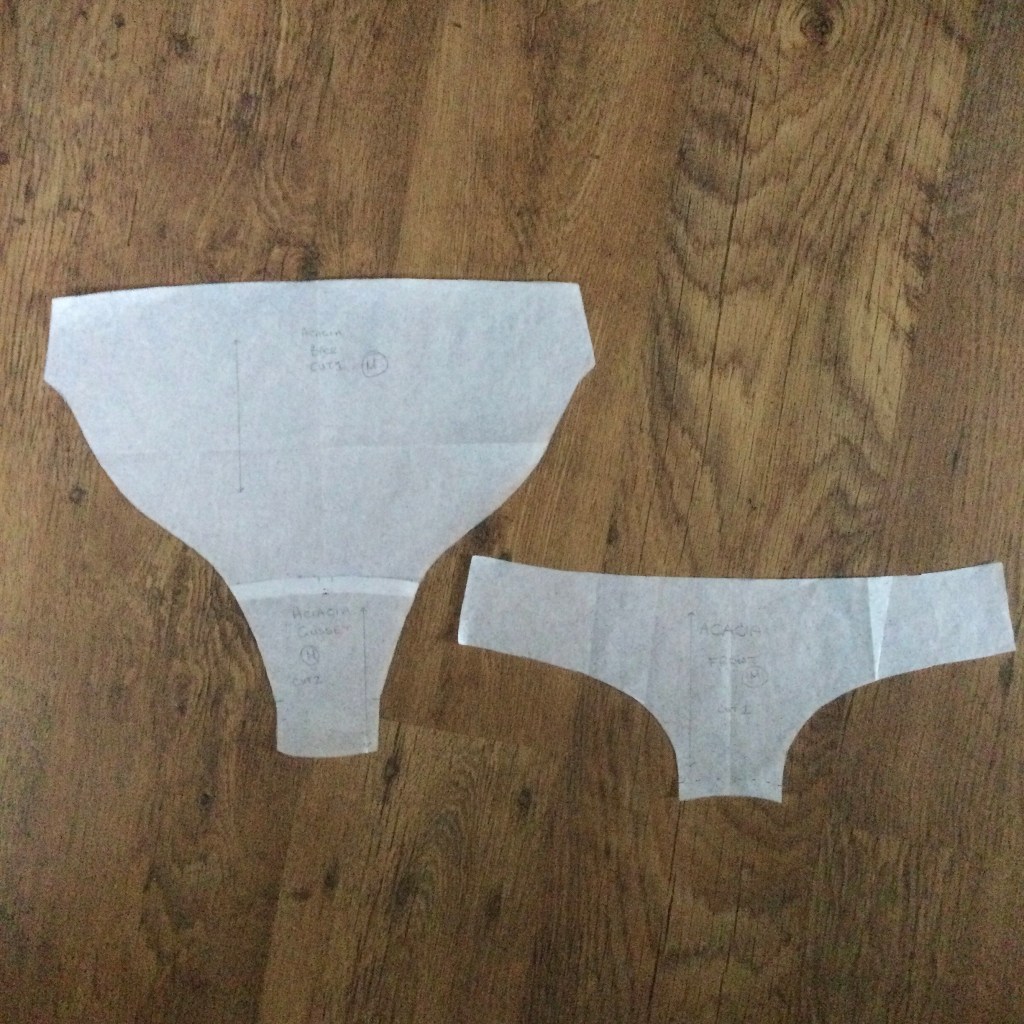
Cut out all your fabric pieces.
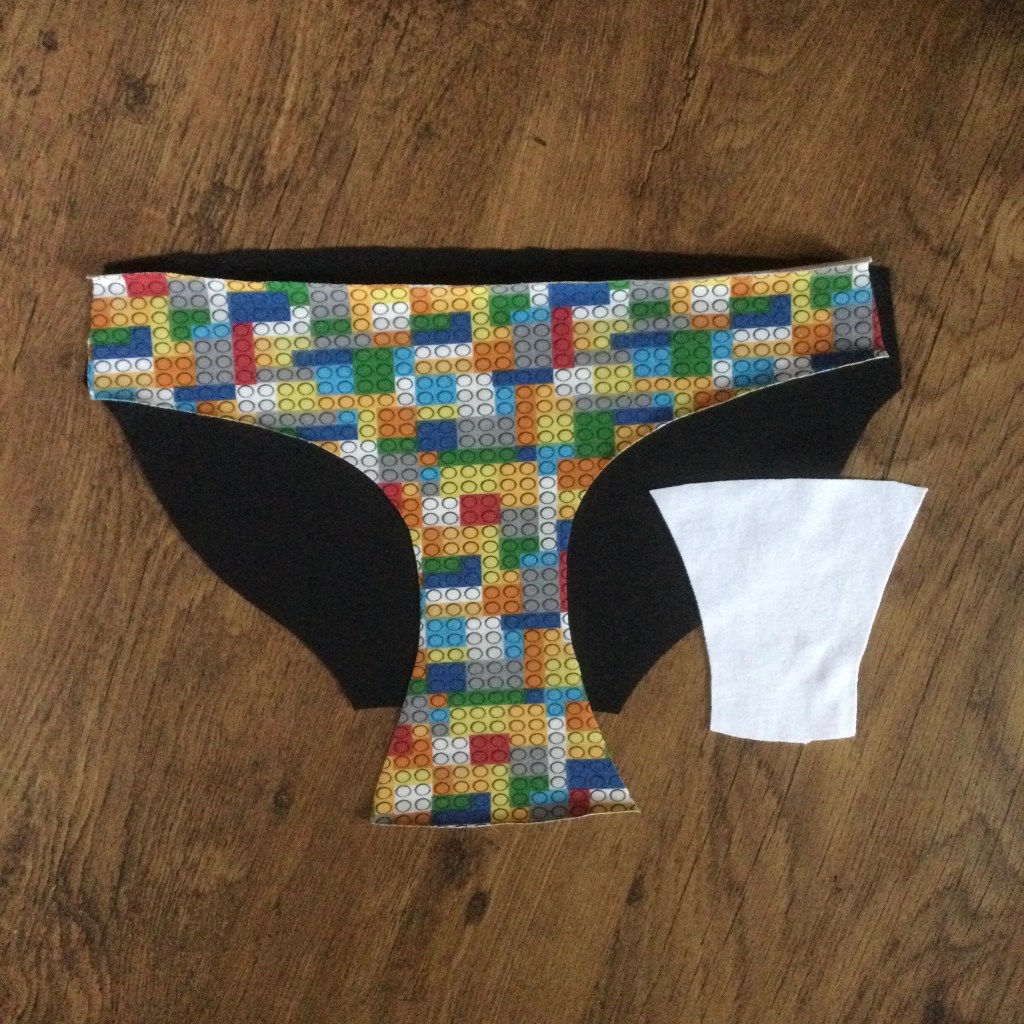
Take the gusset lining and place it right side up. Take the back and place it on top of the gusset lining, right side up. Take the outer gusset and place it on top of the back piece, right side down.
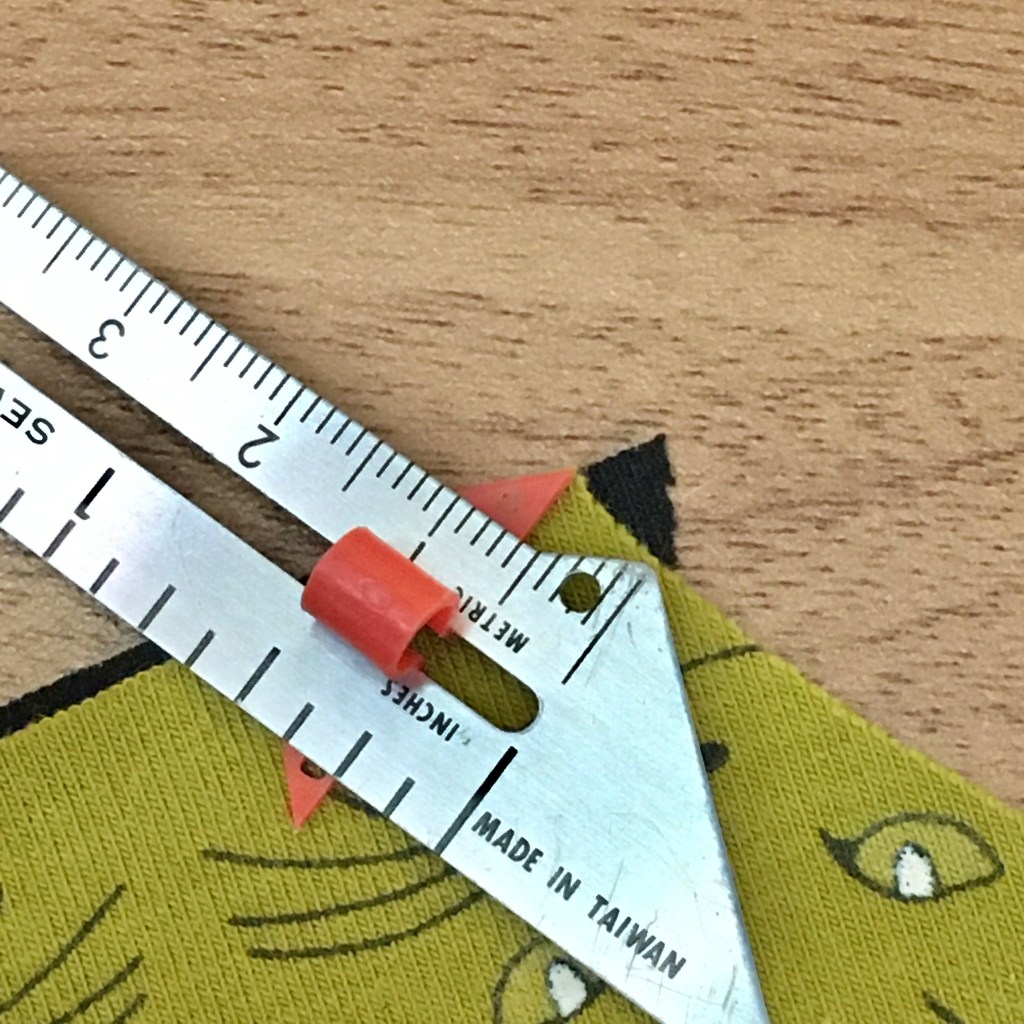
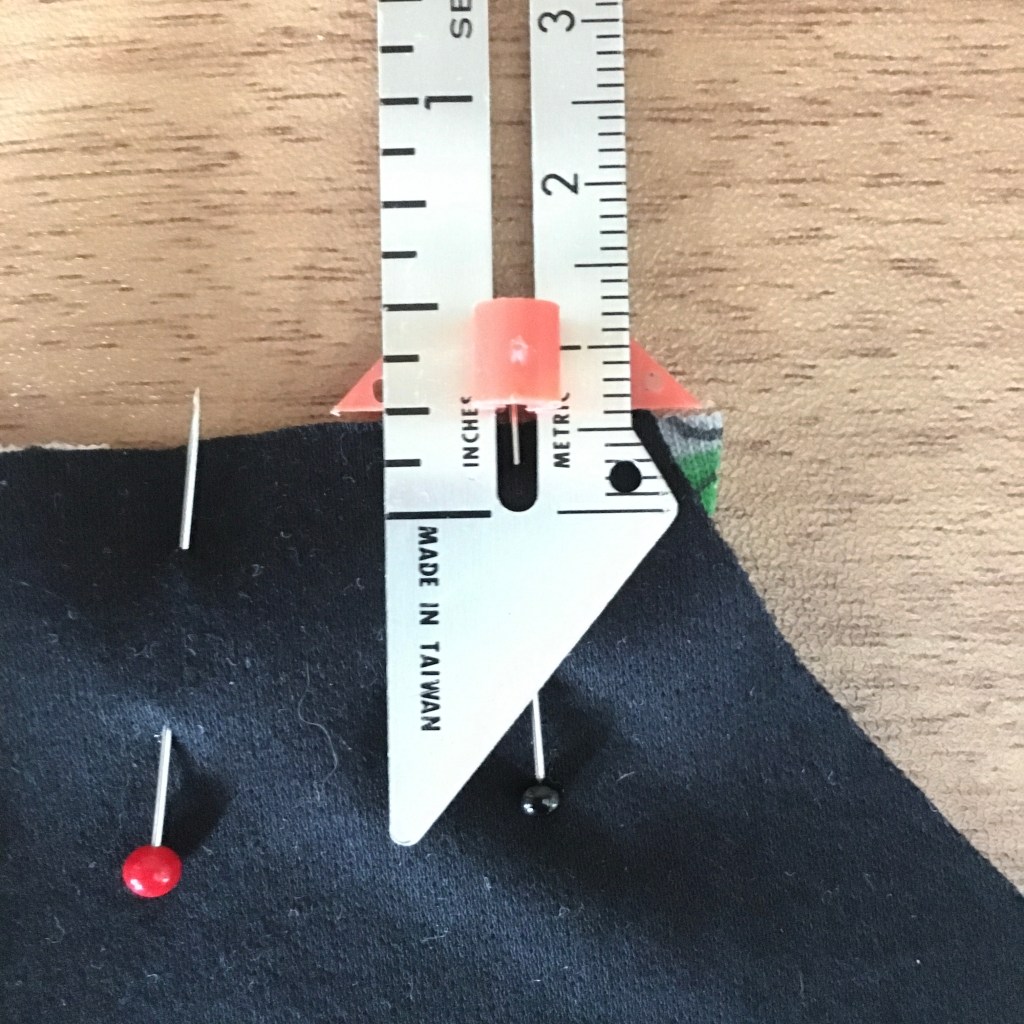
Match the centre notch and pin. Pin the pieces together at the outside edges, it is worth noting here that as the pieces are part of a curve the back piece will only match the gusset edges on the 1/4″ seam line. Add a few more pins to keep the edges secure. I use a pair of tweezers to grab and adjust the pieces, especially the middle layer, when matching the edges.
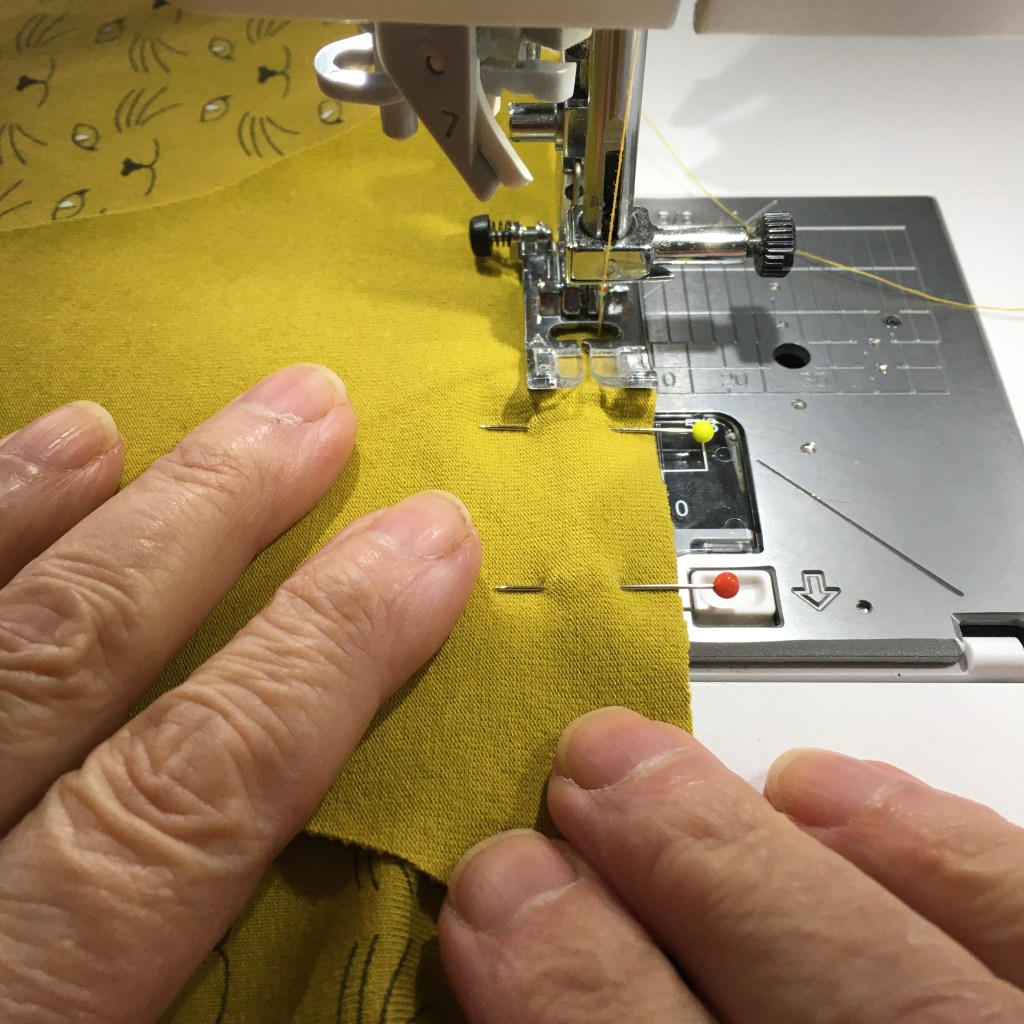
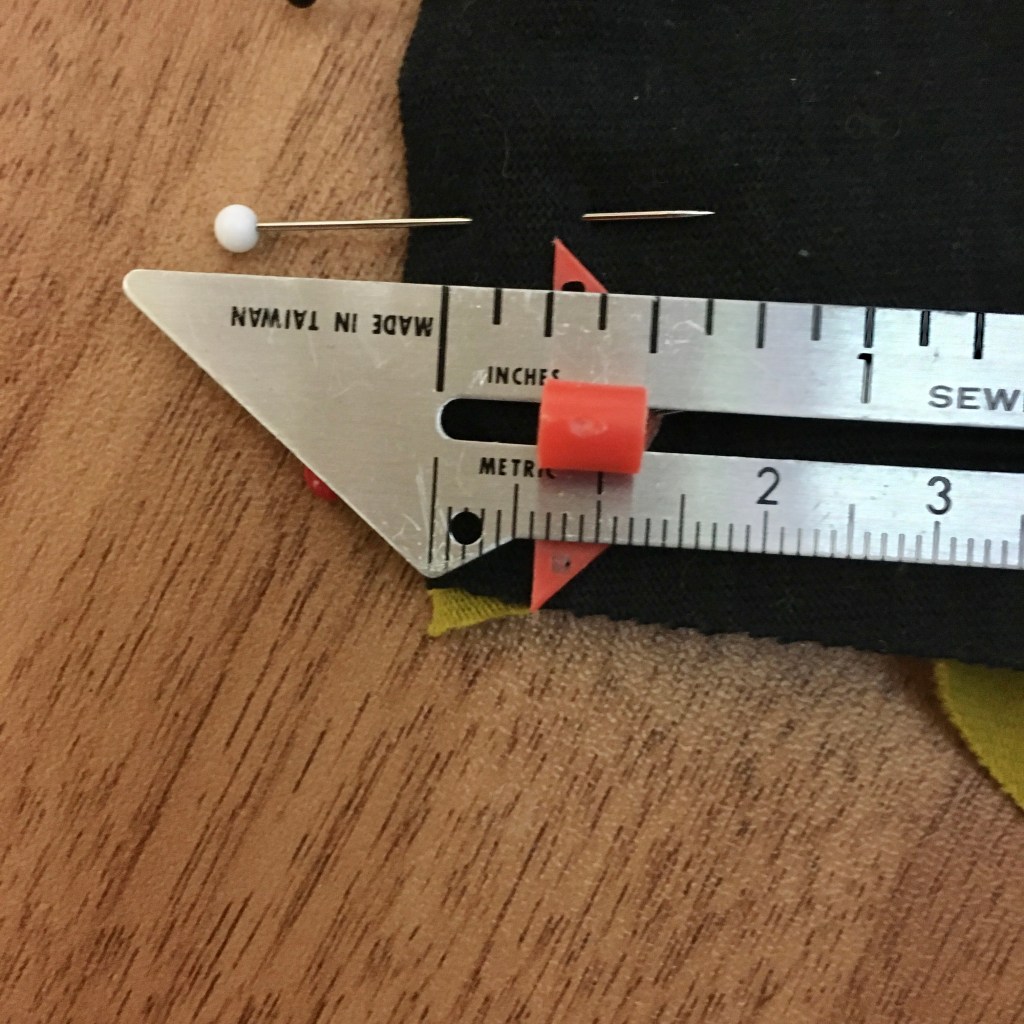
Sew the pieces together using a 1/4″ seam allowance and a straight stitch. On my Juki NX7 I use stitch #3 which is the 1/4″ stitch – the distance between the needle position and the right edge of the foot. I like this stitch as the fabric is in full contact with the feed dogs so will feed evenly through the machine. I also engage the Juki Smart feed / walking foot which will ensures an even feed of all the fabric layers.
The principle I use when deciding whether to use a straight stitch or zig-zag when sewing stretch fabric is “Will I stretch the seam when I am putting it on or taking it off”, I don’t believe that the gusset seams will be under any strain at all so a straight stitch is fine. However, if you want to be sure that the thread will not snap use a very narrow zig zag.
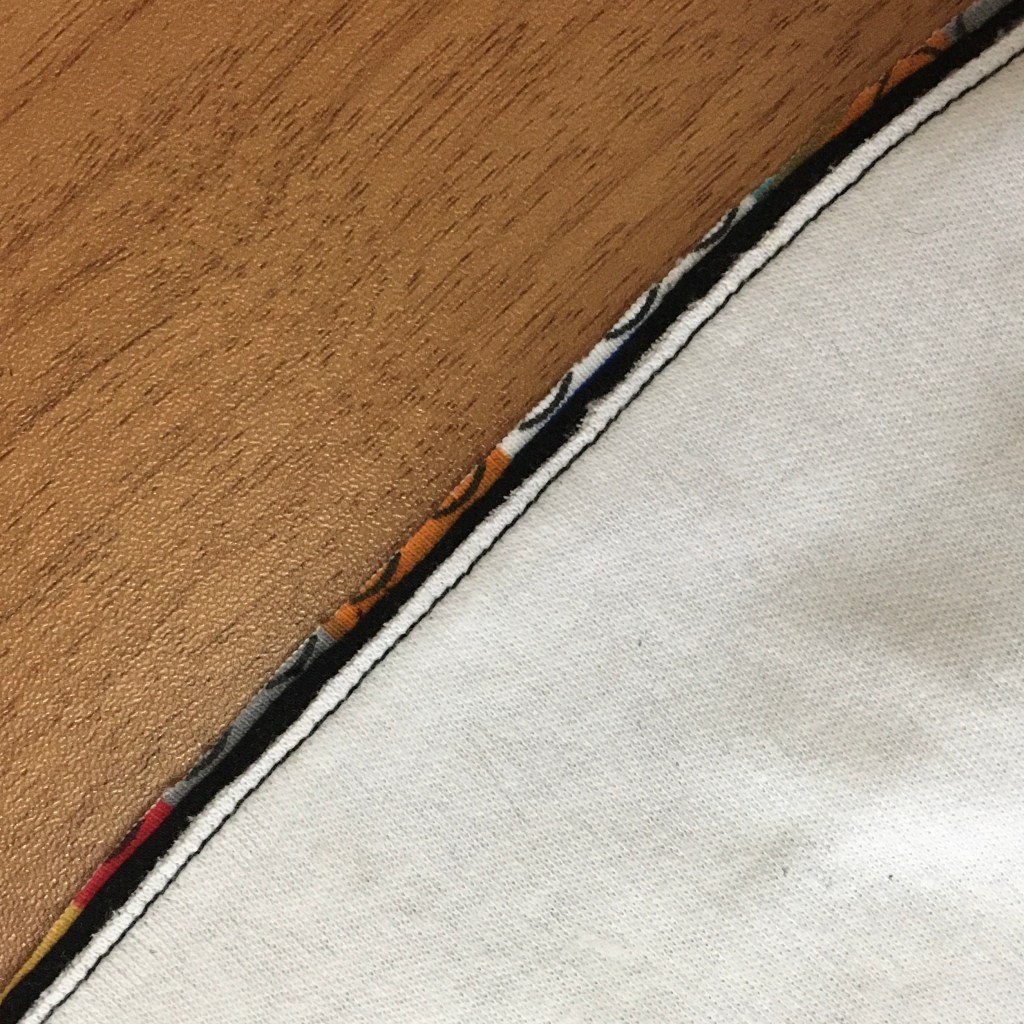
Grade the seam, to avoid bulk, by trimming the gusset lining close to the stitch line, the back piece seam allowance by half and the outer gusset leave as is. When the trimming is done press the gusset pieces away from the back piece, enclosing the seam. I find using a tailors ham makes this a lot easier with the curve of the seam. I only press the seam at this stage as it makes me happy, you can leave all the pressing till the end if you want.
You are then ready to attach the front piece using the Burrito method.
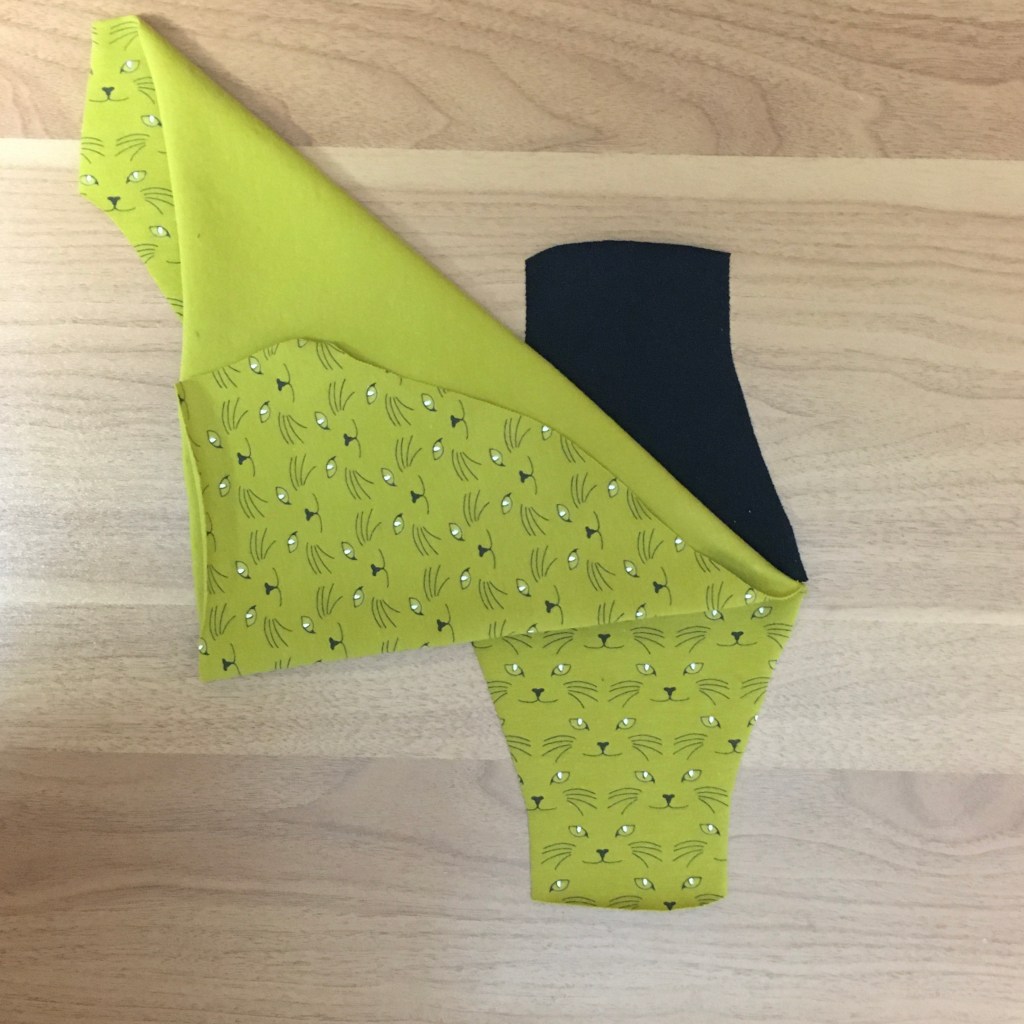
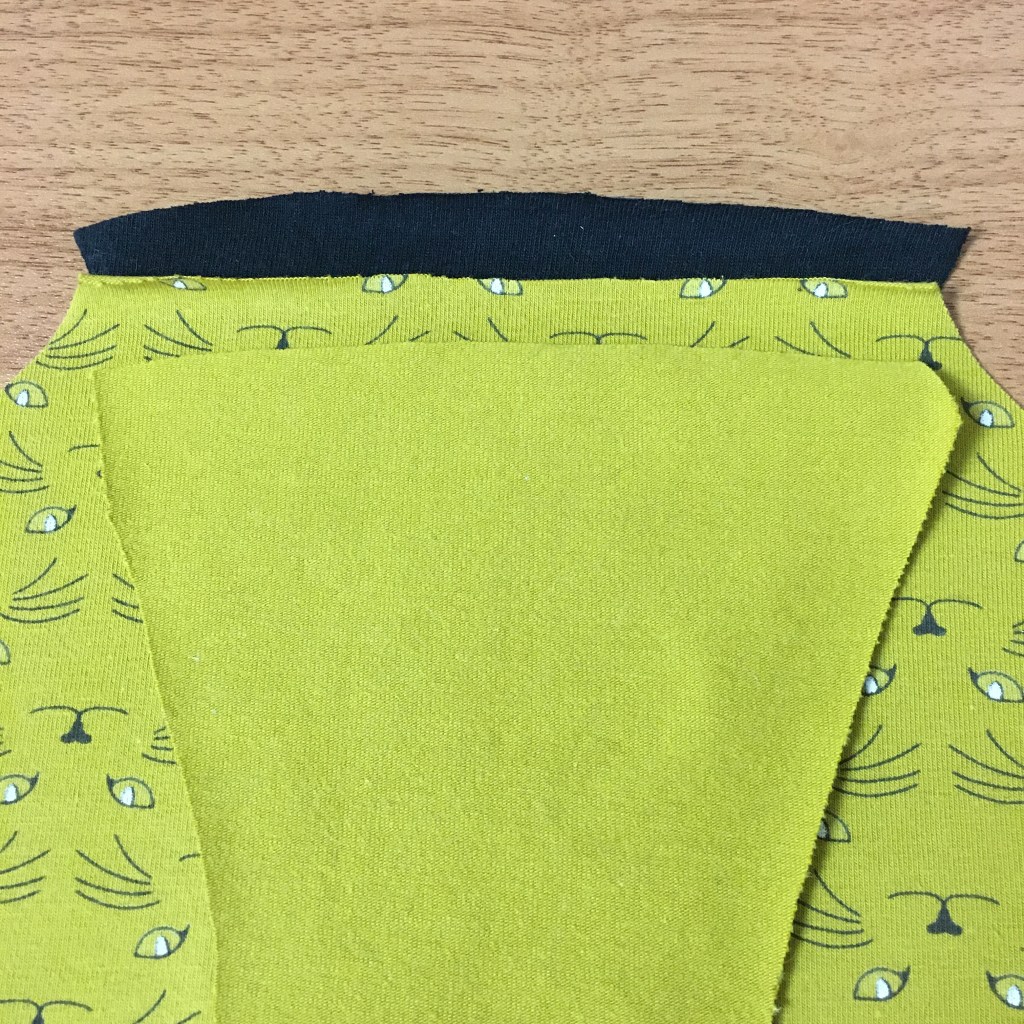
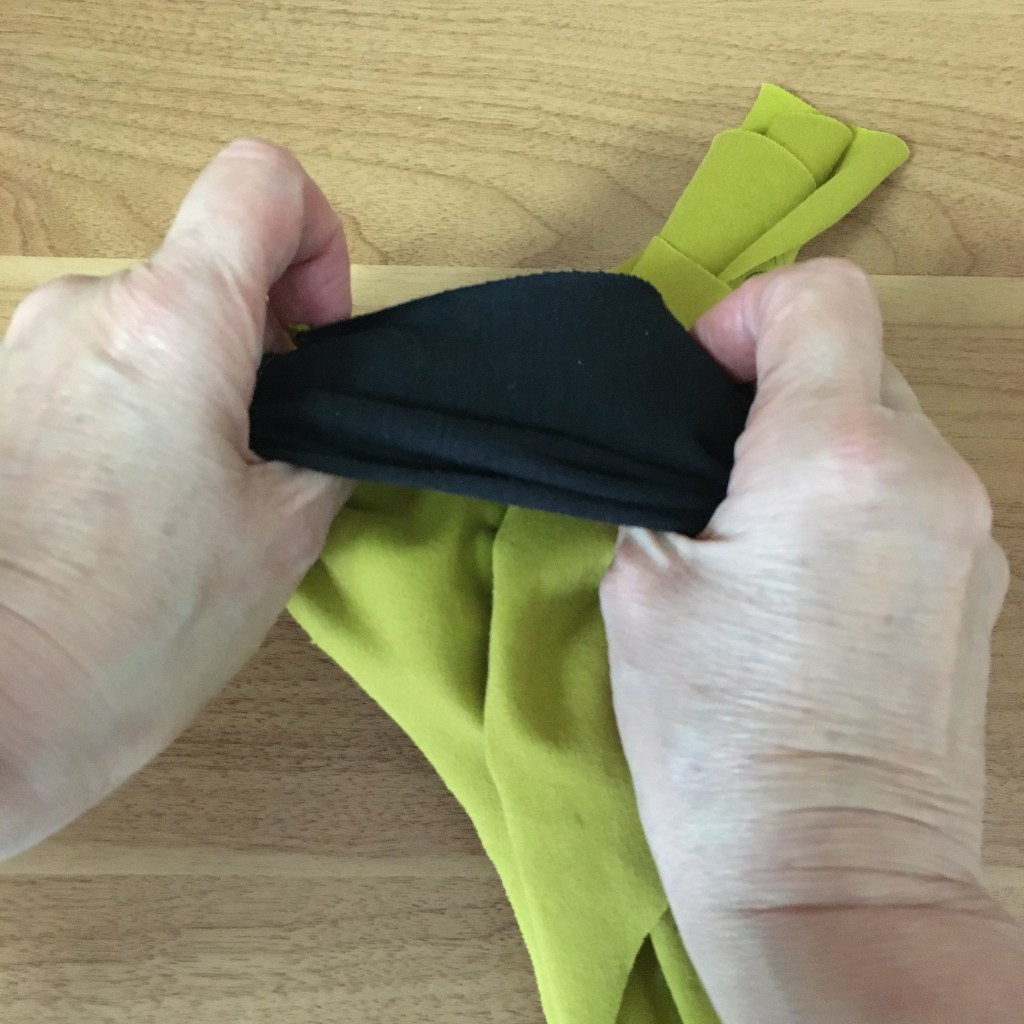
Lay the back down right side facing but with the two gusset pieces separated, the gusset lining to the top and the outer gusset facing down.
Lay the front on top, right side down and pin at the seam edge, matching the centre notch. Start rolling the the fabric down from the top.
Keep rolling, incorporating the front piece, until the whole of the gusset lining is exposed.
Flip the gusset lining over the fabric roll, match the centre notch and pin.
As with the previous gusset seam as the pieces are part of a curve the front piece will only match the gusset edges on the 1/4″ seam line.

Sew the pieces together using a 1/4″ seam allowance and a straight stitch and then grade as before.
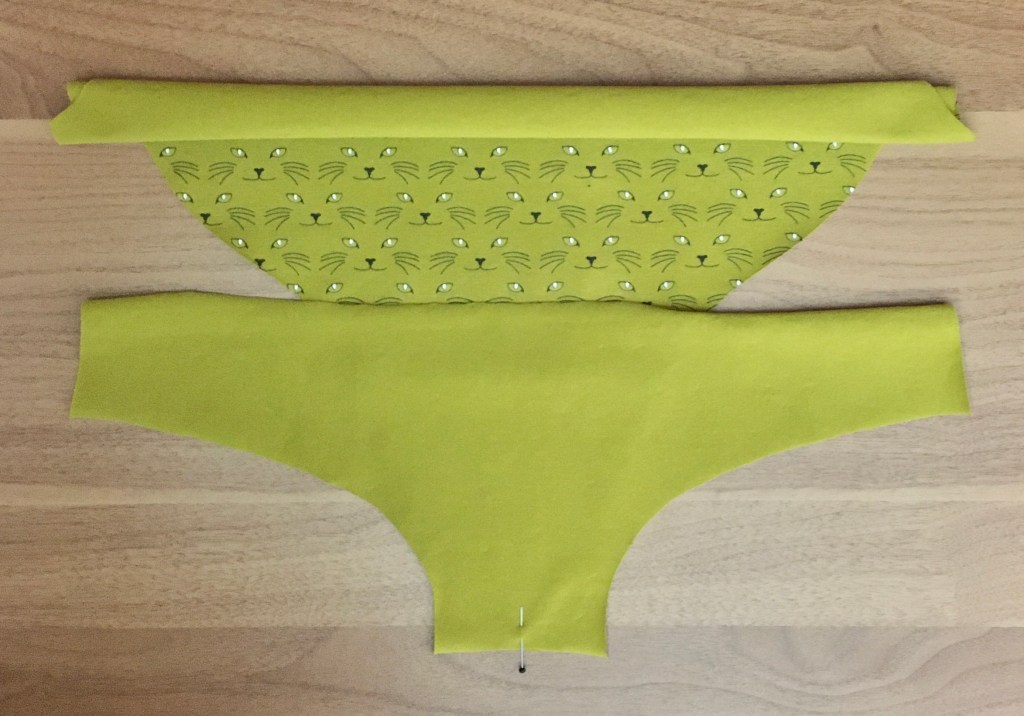
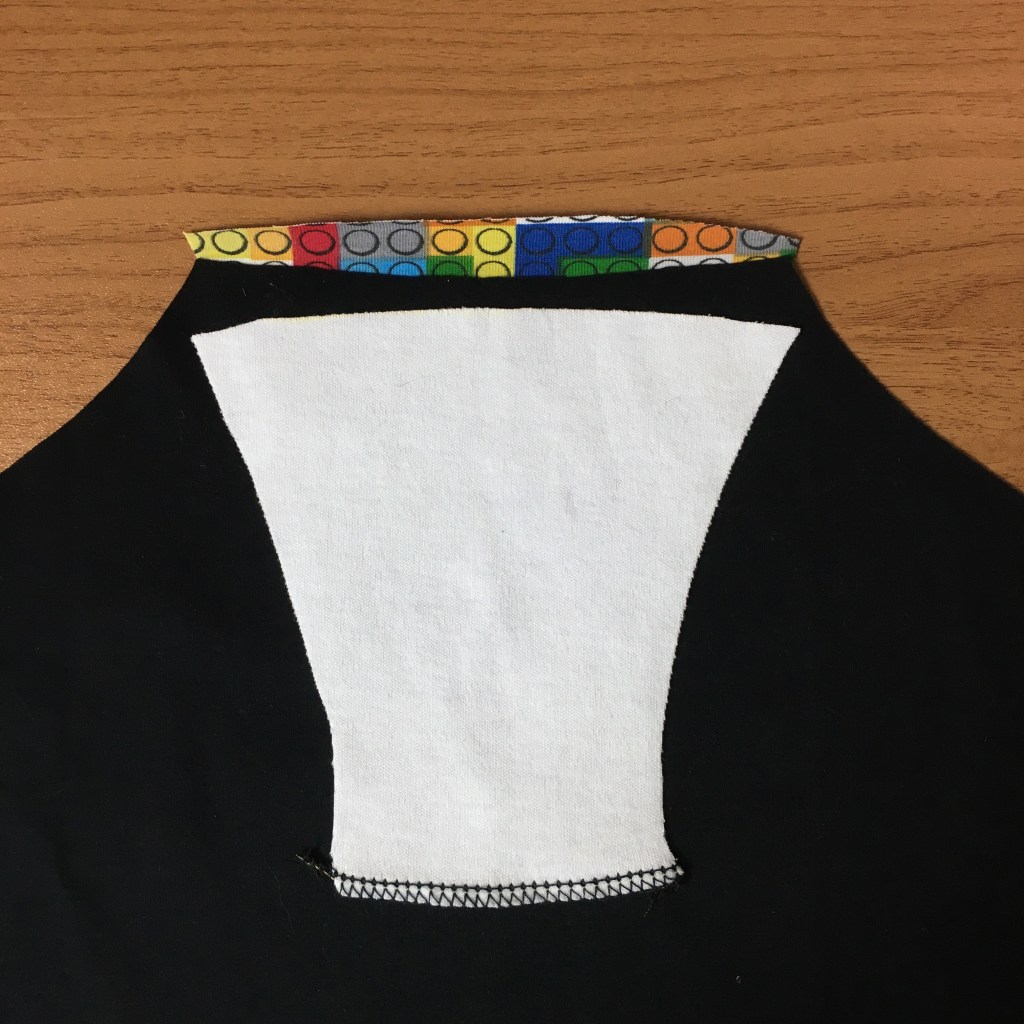
To undo the burrito just place your thumbs under the gusset lining piece and turn inside out.
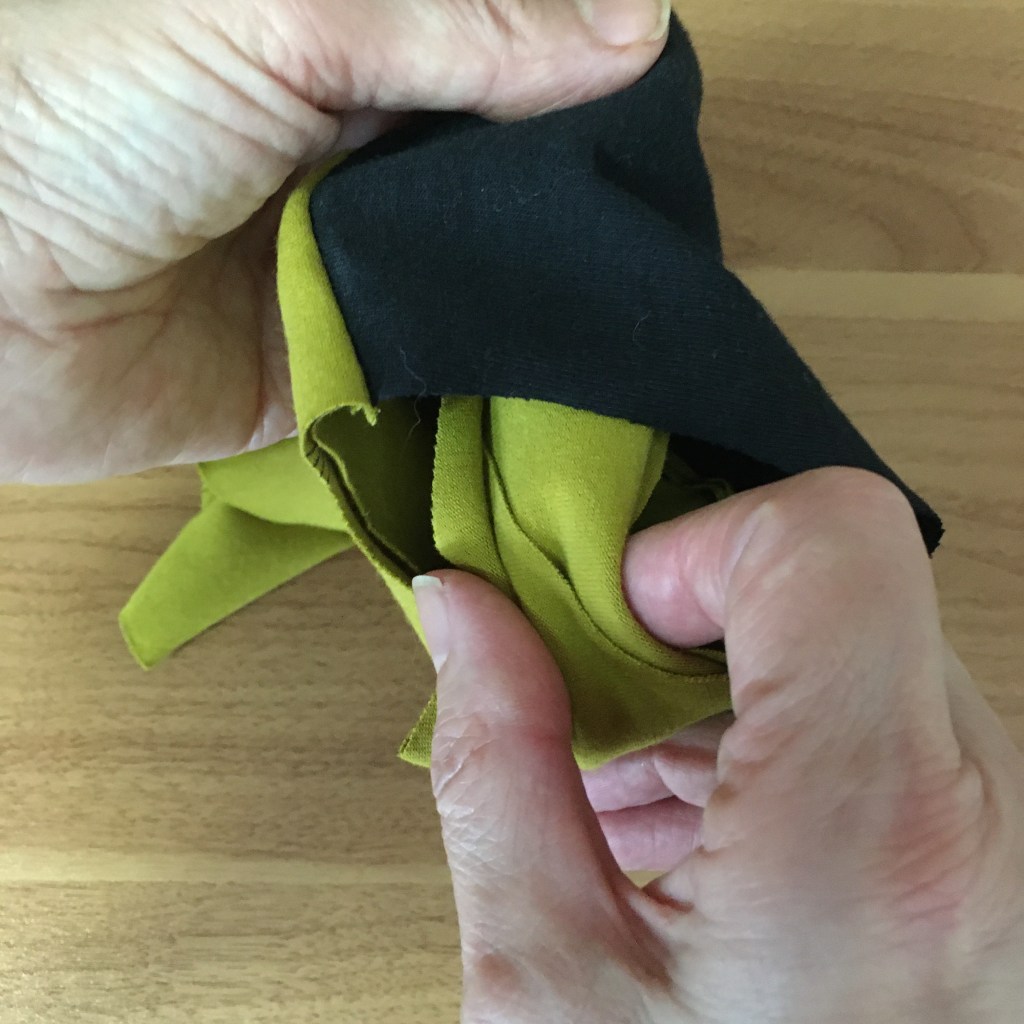
Pull the fabric out from the inside and unroll.
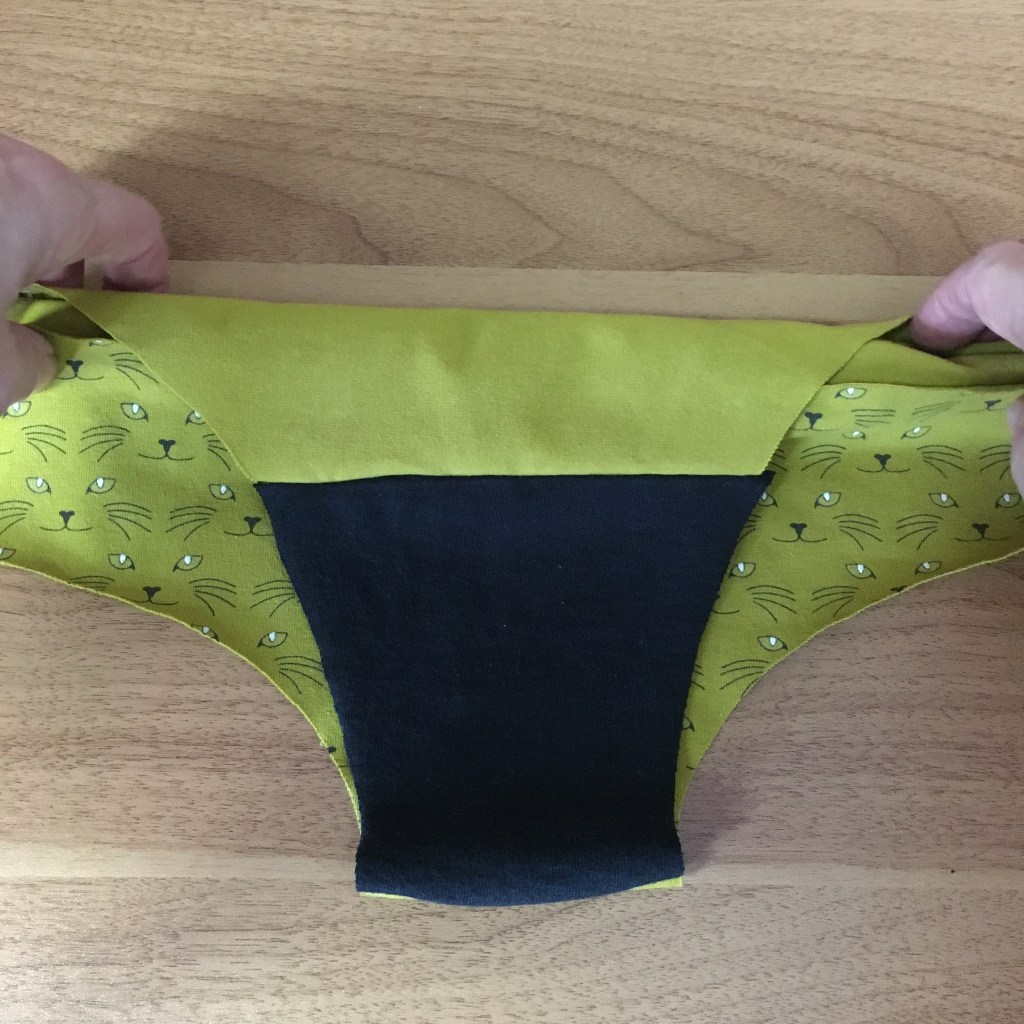
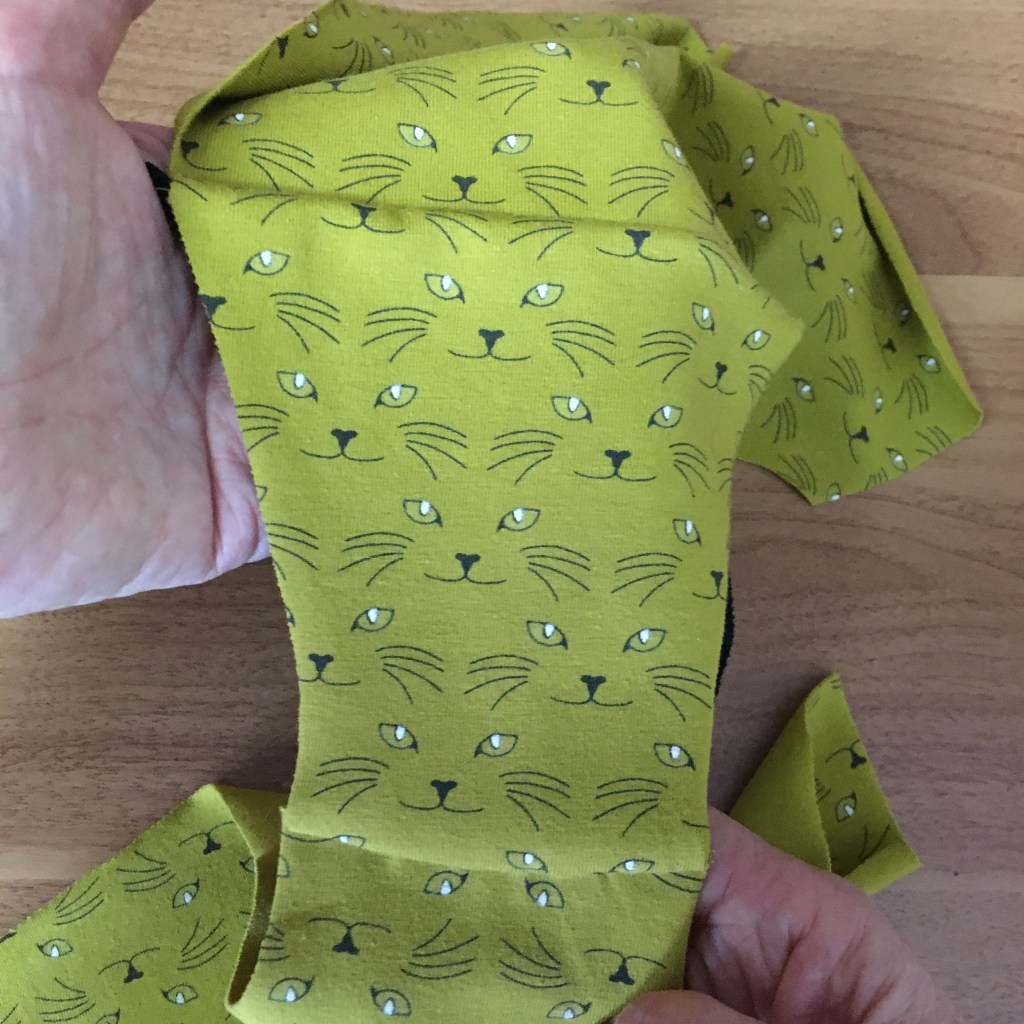
Press the seams, over a tailors ham if you have one, and there you have it, the gusset attached to the front and back pieces with enclosed seams.
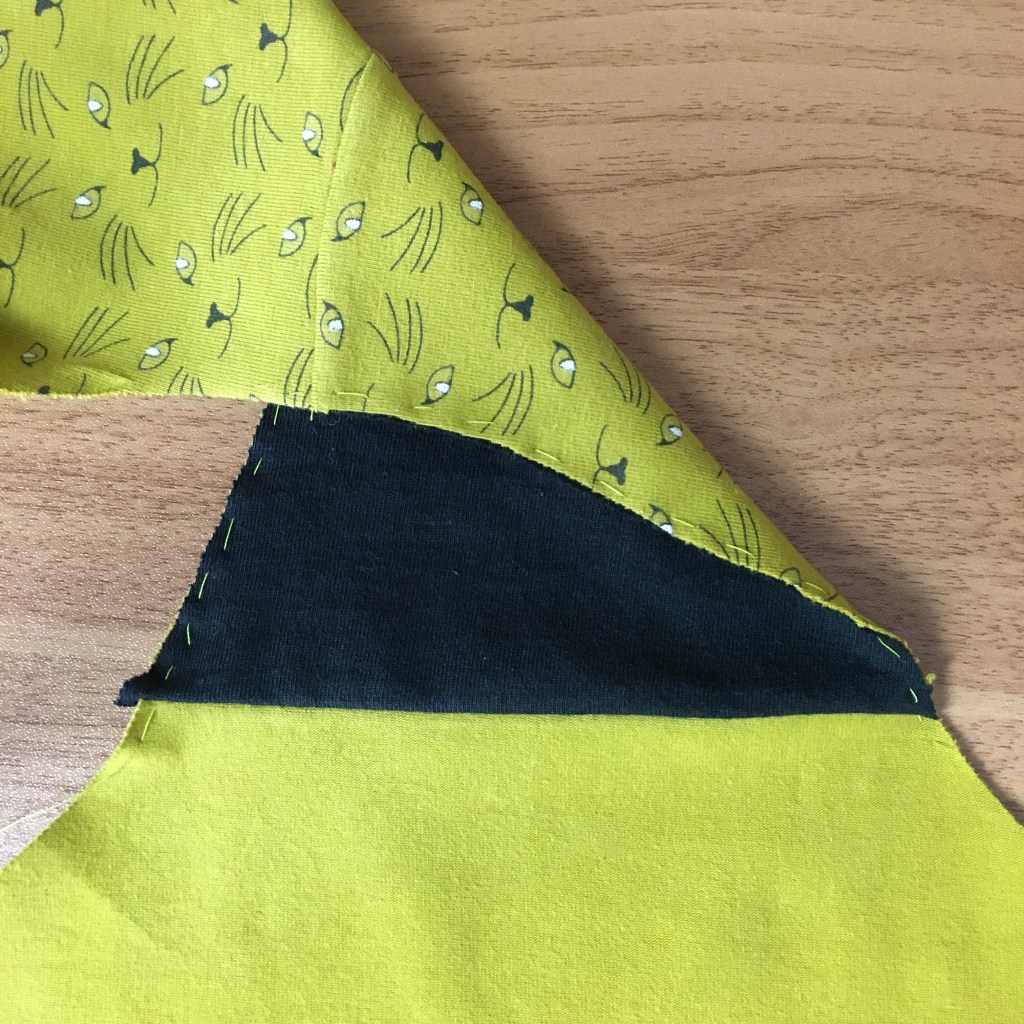
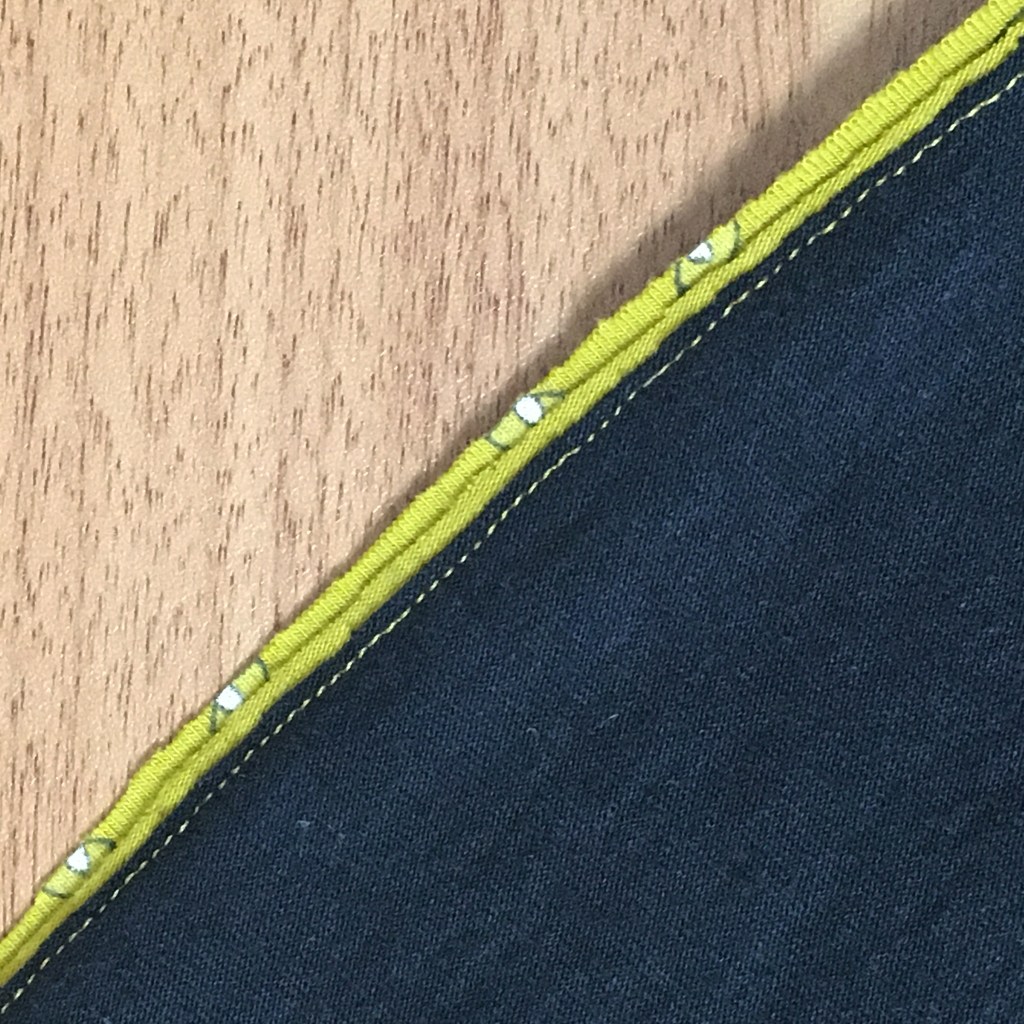
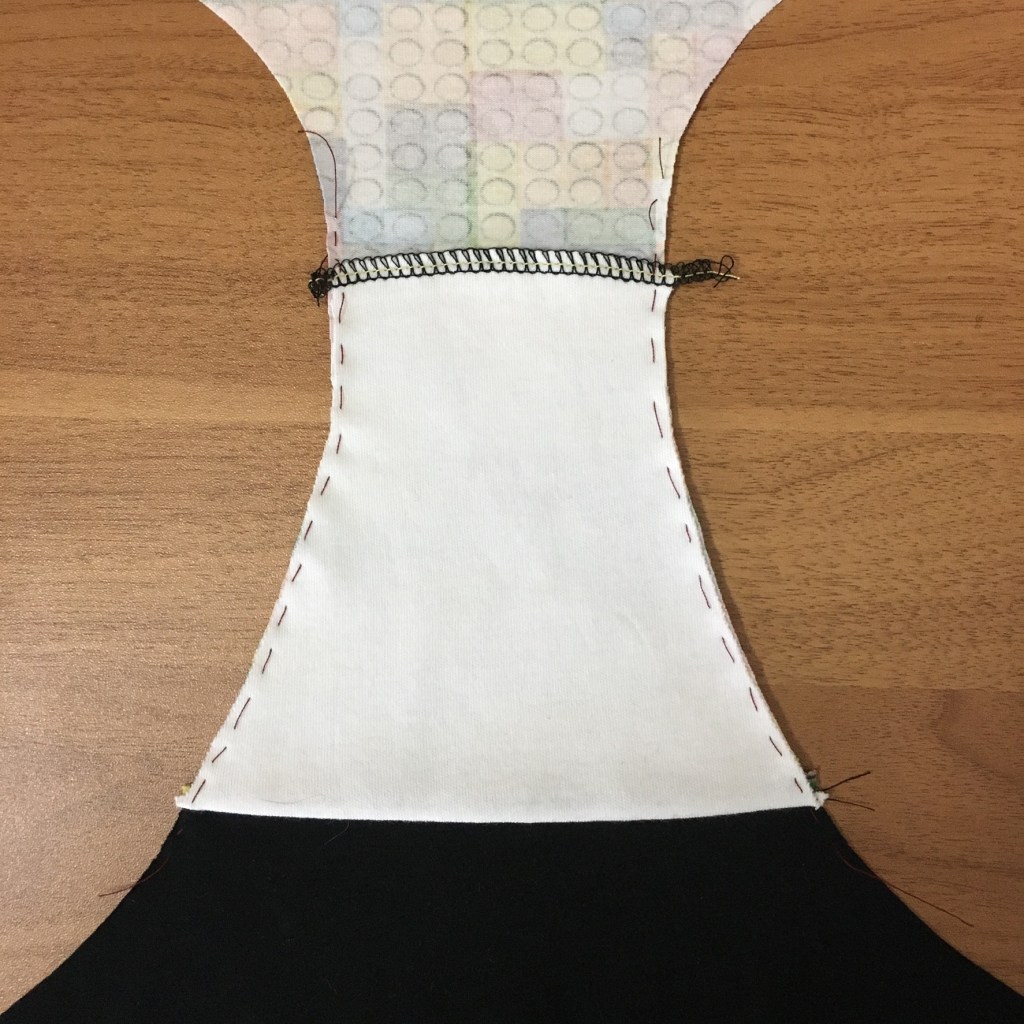
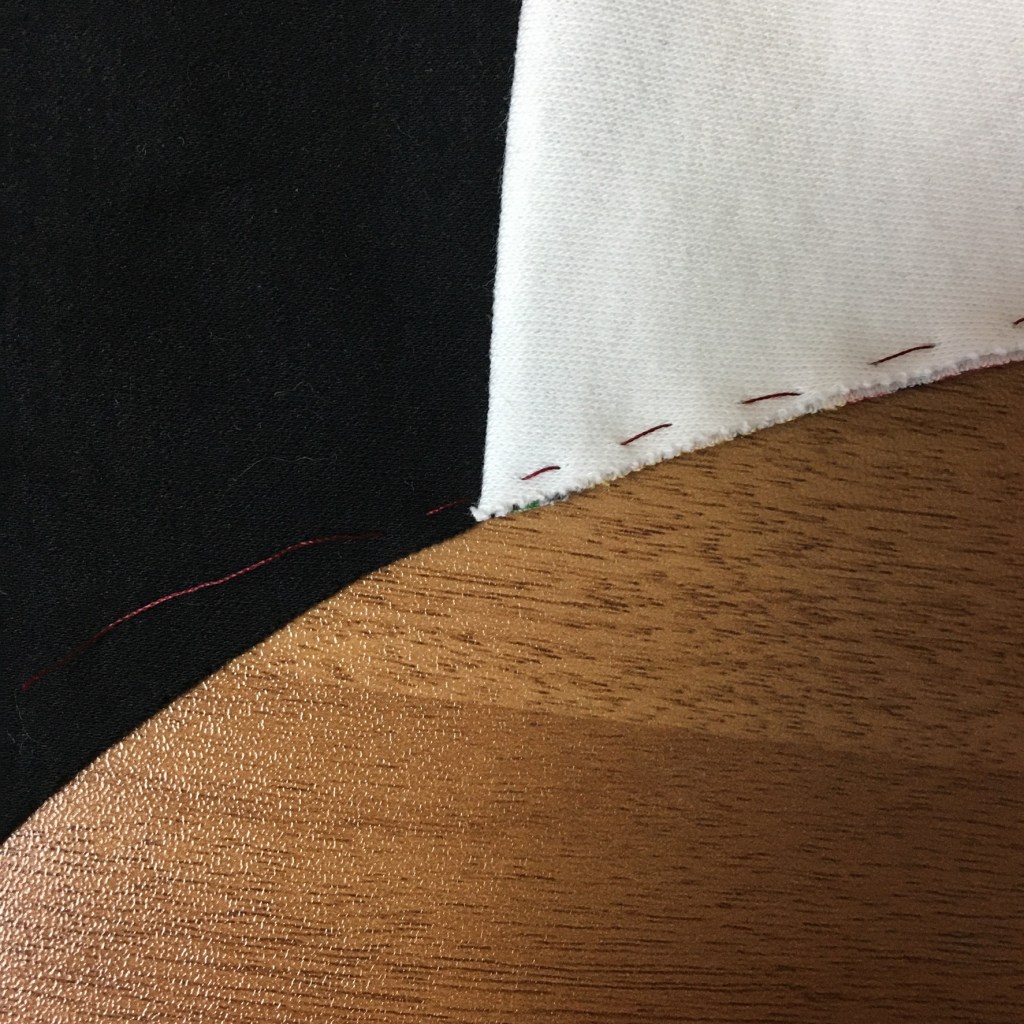
To prepare for the attachment of the Fold Over Elastic, baste the two layers of the gusset together close to the edge.
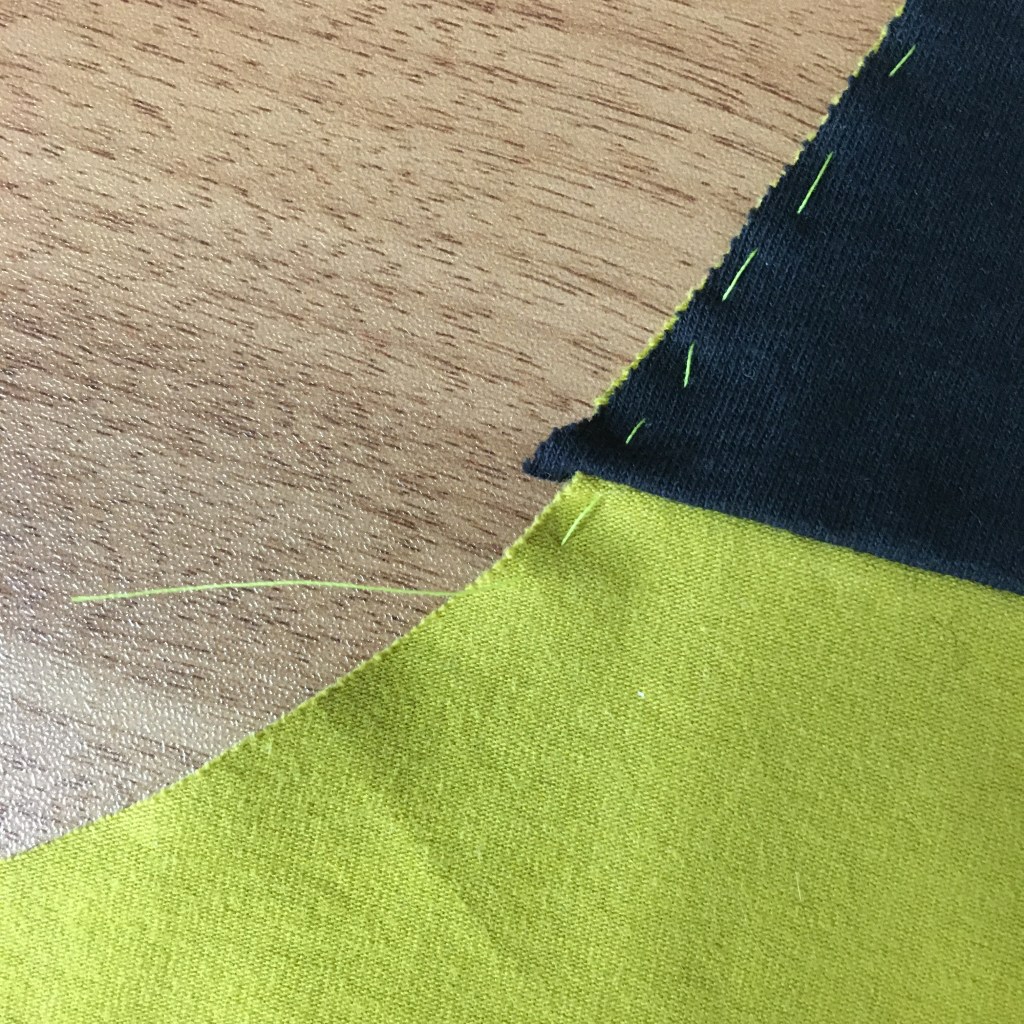
And to finish, snip off any seam allowance that is sticking out from the edge.

The leg edge is now ready for the elastic to be attached.
Single seam method
When I have enough fabric I prefer to use the single seam method. For this method I cut the outer gusset and the front or back in one piece by overlaying the pattern pieces with a 1/2″ overlap (2 x 1/4″ seam allowances). However, when making knickers this way I do use an overlocker.
My favourite option is adding the gusset to the front piece for no other reason than I think it looks better.
Adding the gusset to the back piece is useful if you only have a narrow piece of fabric to cut the front out of.
Also you may have fit or comfort preferences that will make you prefer one way over the other.
Cut out your pieces.

As the front of the gusset lining will not be attached in a seam, finish the raw edge on the overlocker. I have tried to find an alternative stitch for the sewing machine but didn’t find anything I was happy with. However, as this is jersey and it will not fray, you may be happy leaving it as a raw edge.
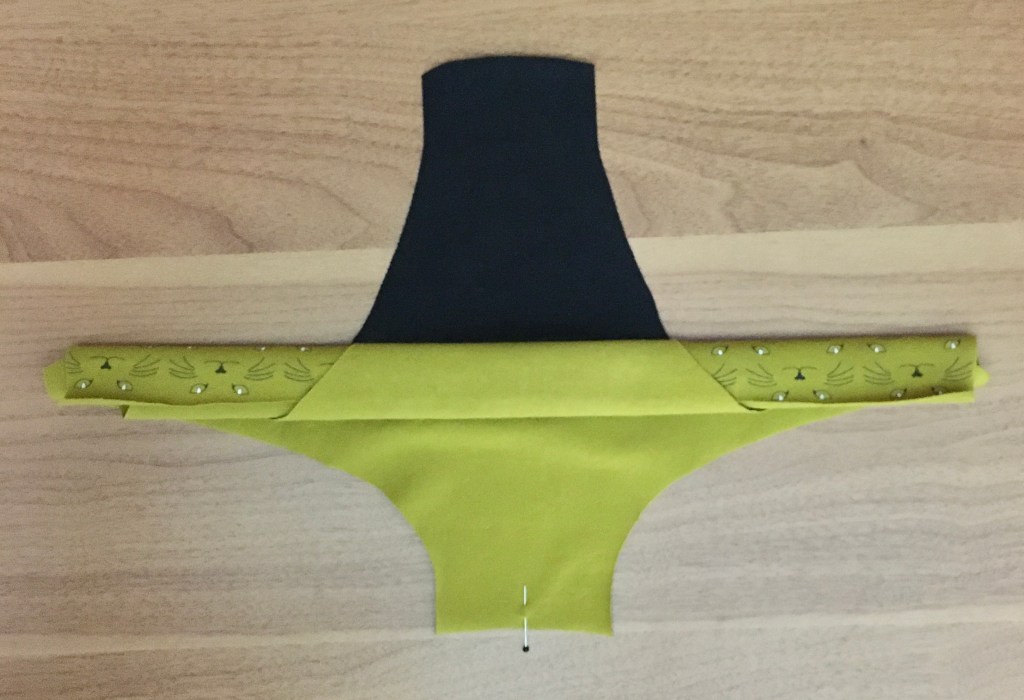
Take the front, which includes the outer gusset, and place it right side up. Take the back and place it on top of the front, right side down. Take the gusset lining and place it on top of the back, right side down.
Match the centre notch and pin. Pin the pieces together at the outside edges, it is worth noting here again that as the pieces are part of a curve the back piece will only match the gusset edges on the 1/4″ seam line. Add a few more pins to keep the edges secure, I use a pair of tweezers to grab and adjust the pieces, especially the middle layer, when matching the edges.

As in the first method, sew the pieces together using a 1/4″ seam allowance and a straight stitch, or a narrow zig zag if you prefer, with a walking foot if possible.
Grade the seam as before, trimming the gusset lining close to the stitch line, the back piece by half and the outer gusset leave as is. When the trimming is complete press the gusset pieces away from the back piece over a sewing ham if you have one. All pieces of the knickers are now attached.
To prepare for the attachment of the Fold Over Elastic, baste the two layers of the gusset together close to the edge. As the gusset lining is loose this is an important step in this method.

And to finish, snip off any seam allowance that is sticking out from the edge
The leg edge is now ready for the elastic to be attached.
So there you have it, two methods on how to attach the gussets to your knickers.
Next up: Adding the Fold Over Elastic to the leg seam.

HUGE thank you for describing and photographing two different methods for us to choose from, Mercedes!
I tend to go cross-eyed over burrito descriptions, but managed to stay focused through your first example. Will have to come back to the second, and might cut out an example to help me understand it better. (I’ve already cut out pieces so could visualise the first.)
Now to get in front of the sewing machine . . . . . . one step at a time!
LikeLike
You are welcome. It is also handy for me to document my methods as sometimes I forget how I did things 🤦🏻. Please message me if you have any questions. Enjoy trying them out. Xx
LikeLiked by 1 person
🙏🏼
💕 💕
LikeLiked by 1 person
the gusset is too far back, can tell from the seam would rest on the most sensitive area, this providing no protection for mishaps. Why can’t the gusset start earlier at the pubic bone?
Who cares if the seam is then visible, no-one looking!
LikeLiked by 1 person
Thank you for your comment.
This is my favourite pattern, which I wear nearly every day, and I have had absolutely no issues with the positioning of the gusset at all. If you personally like the gusset to start at the pubic bone that is the joy of sewing as you can just adjust the pattern to suit you.
Regards
LikeLike