
As I said in part one, during August the amazing team at @sewover50 explored the theme of sustainability in sewing. This got me thinking about different ways to stay within the sustainable banner but also stay up to date with the latest fashion trends, so after Googling fashion trends autumn 2021 I encountered the Sweater Vest.
In Part one I described how I created my own Sweater Vest pattern and used off-cuts to turn it in to a reality, now is the turn of my refashioning project.
I had in mind what I was after for my refashioning project and was so pleased to find this roll neck long sleeve top in my favourite charity shop. This would be perfect for a quick refashion in to the garment of the Autumn – The Sweater Vest.

Looking at the construction I could see that the sleeves had been sewn on with a chain stitch so would be easy to remove. The roll neck, however was knitted on to the body so I would need to ensure that I stablised my cutting line for any adjustments I needed to make.
The sleeves were easy to remove once I had worked out the direction of stitching, just snip the thread and it will unravel, and I was left with neat edges on the body and sleeve pieces.

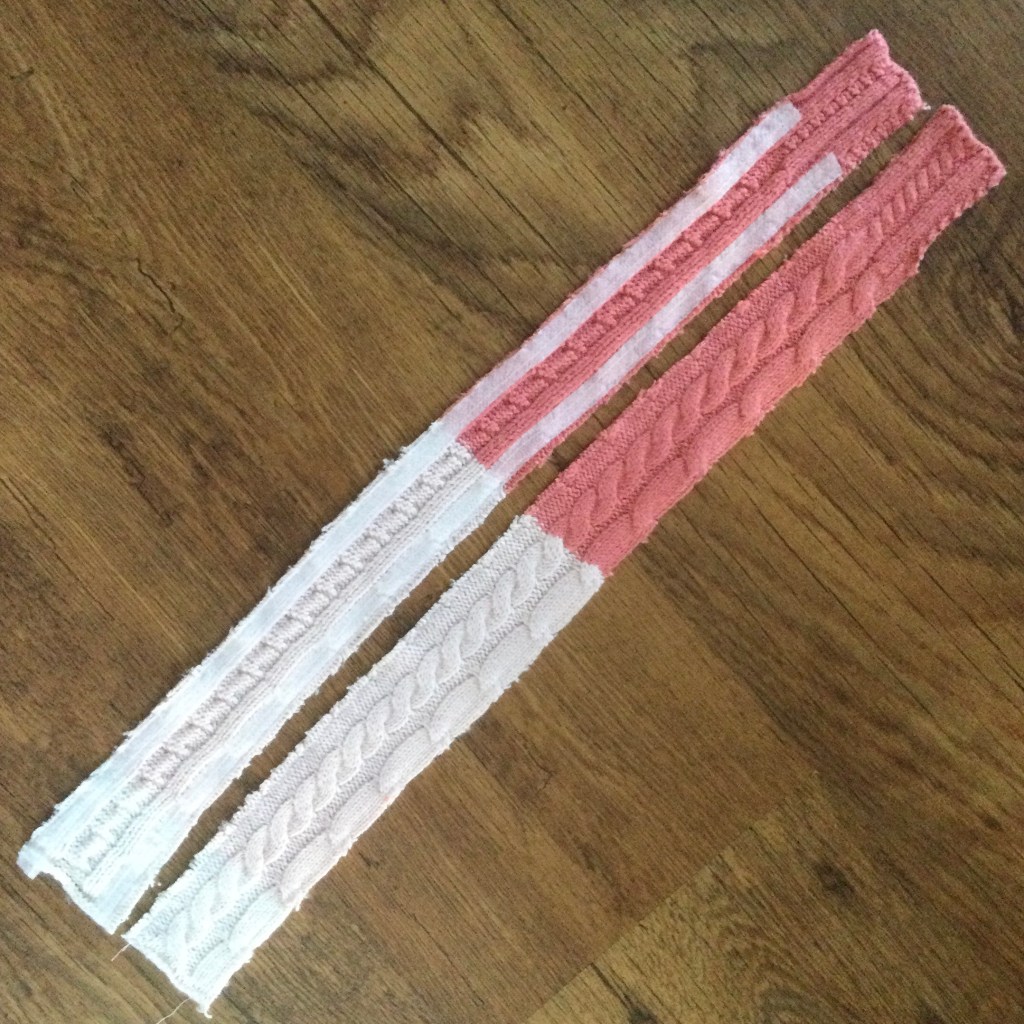
I knew that I wanted a V neck and I wanted to utilise one of the cable designs from the sleeves to create it, so did a few flat lays to see how they may look.

I decided I preferred the smaller cable as the longer one seemed to blend in to the stitching more and I did want the edging to stand out.
It worked out that I could cut two strips from one sleeve and this would be sufficient for the whole neckline. I also decided to keep the order of the colours, light down to dark, as It would would keep my logical mind happy.
The first thing to do would be to add bias seam tape along the edge of my cutting line and to be doubly safe I also did a line of stitching along the edge of the seam tape. I shortened the stitch to a 1.00 on my Juki NX7 and as always with knitted fabric, engaged my walking foot.


I then cut each strip out with a rotary cutter, which I thought would cut the knitting easier then a pair of scissors.
I then joined the two strips together at the back neck point, which was a simple straight seam join, and at the point of the V, which I created by sewing the two strips together with a right angled stitch line. For added stability I added a second stitch line 2mm away from the first. For all these seams I kept my stitch length at 1.0 to help prevent the knitted fabric unravelling.

Next I added the new neck band to the body of the jumper. As I had used the maximum length of the strip that I could get from the sleeve, I started pining at the centre back seam through to the shoulder seam. From here I established where the centre would fall and then continued pining in place till about 5cm/2″ from the point. The reason for this is that until the fabric is removed and the point of the V can be snipped it will be impossible to attach the neck band all the way down to the point. I then stitched the strip to the body up to the 5cm point on each side so I could then cut away the excess fabric and attach the point to the fabric neatly.

I then over locked the edge with my Juki MO-654de, starting and finishing at the centre back neck. I do need to point out that there is a lot of bulk going through the overlocker and even I was slightly concerned that I was asking too much, but everything ran through the machine beautifully. There is one thing that is slightly confusing me and I know it is not a biggie because it will never be seen but, why did I use white thread in my overlocker and not cream?
Once the neck band was attached and overlocked I steamed it flat and finished off with top stitching to keep everything neat and tidy.

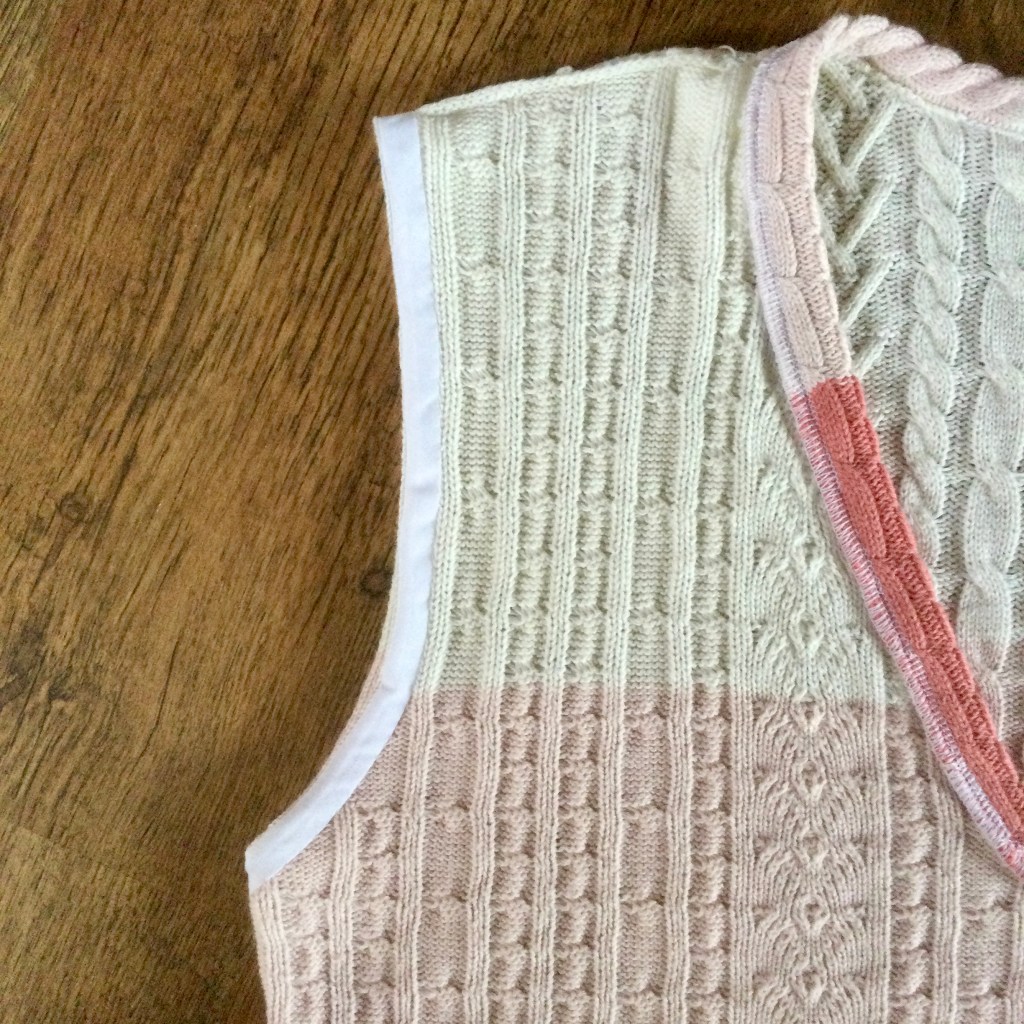
All that was left now to finish off my refashioned sweater vest was the arm holes. Originally, in my mind, I saw the arms holes being completed the same way as the V neck with a line of cable from the sleeve being used as a band. However, when I mocked it up I was not sure whether it would be too much with the cable around the neck as well. I also liked the simplicity of the original finish around the armhole so decided to make that the finish and it would leave me with the option to add a cable finish later if I wanted to.

To finish the edge I used a narrow bias binding, I only had white in my stash but would have preferred a cream (which is when I started wondering why I had used white overlocking thread). I attached it close to the outside edge of the arm hole so as to keep as much of the stocking stitch edge as possible and then hand stitched it in place.
You may have seen my Instagram post on this stage of the refashioning. I am delighted to report that using my friend Jens Bees Wax, the stitching was very smooth and I did not manage to create one single knot in my thread, which is a rare occurrence for me.
So here it is, my second Sweater Vest for this season refashioned from a roll neck jumper. Once again, as I always say and I hope I am not getting too boring, this is my version and I hope my ideas are useful to you so you can make one that is your own.

