
The side seams have been sewn and your knickers are looking good, all that is left now is part 5, and penultimate post, in my knicker mini series – adding the FOE (Fold Over Elastic) to the waist. This step is easier than adding the FOE to the legs as you are dealing with a straight edge, not the swerves and curves shaping as before. Once again I will be using the Megan Nielsen Acacia pattern and a standard sewing machine.
As the waist is a straightish edge we can attach the FOE in one step. On the leg, using the narrow zig zag first was to ensure the FOE was attached evenly to the fabric around all the shaping. At the waist, the shaping is either non existent or minimal, so this step can be skipped and you can go straight to the triple zig zag. The only difference is, however, as all the seams are sewn, it will be attached in the round, but once again as the edges are straight this is not a problem.
I use a 90% length of FOE for the waist, pre stretched before being measured and cut, as I did on the leg edge. Sew the ends together and trim the seam to avoid bulk. My preferred way to sew the elastic is with a straight stitch, there is no vertical pressure on this seam at all, starting just below the middle, back stitch to the edge with one stitch over, stitch to the bottom, one stitch over then back stitch to just past the middle. This provides a secure seam and all the thread tails can be cut off to keep things tidy.
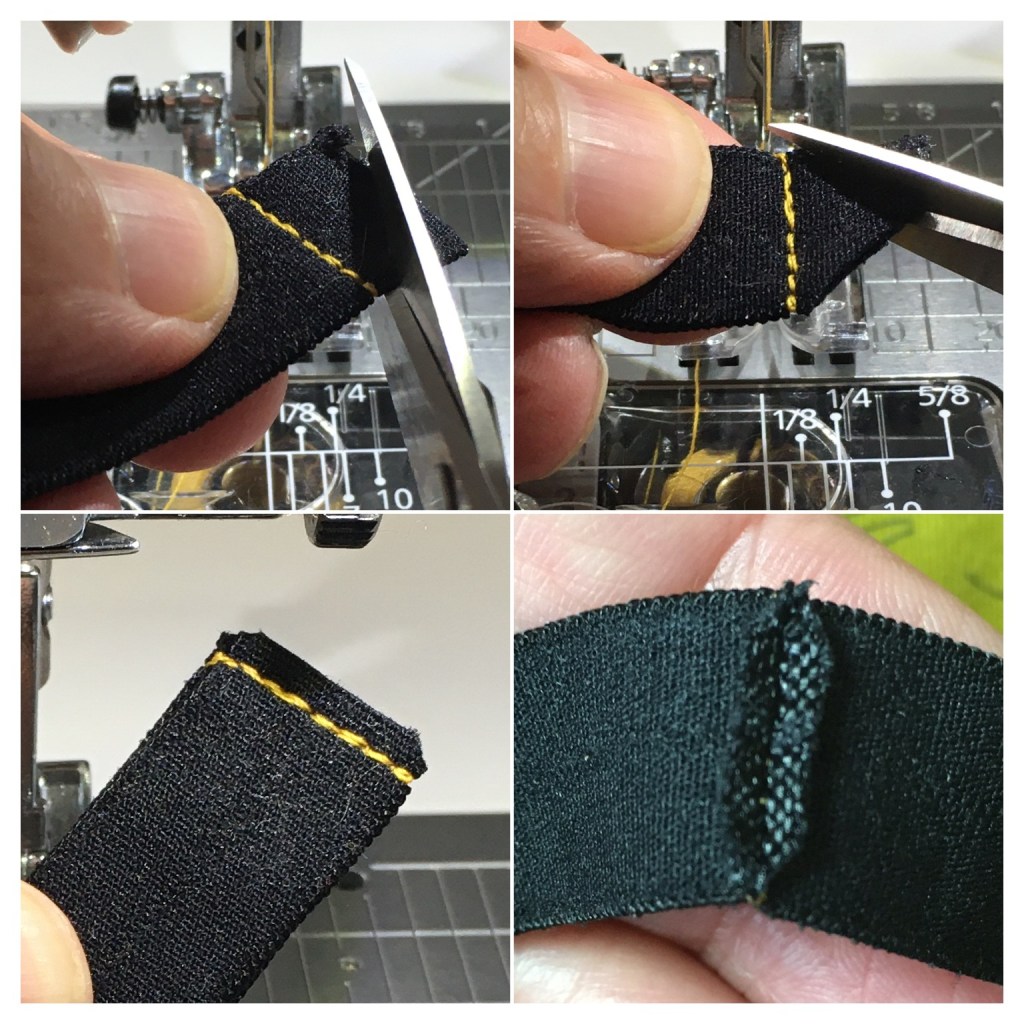
The double stitched seam also gives you security when reducing the seam allowance. I am fearless when trimming this seam, but it does make a difference. Clip off the corners close to the stitching then trim what ever is left to 2-3 mm and press the seam open.
I mentioned when talking about the side seams that ensuring that the FOE at the leg edge matches means there is a chance that the seam at the waist may not match. If the edge is only slightly out, ignore it, as it will be covered by the FOE and no one will ever notice. If there is a big difference then re shape to compensate, not forgetting it can be slightly out as it will be covered by the FOE. This may not happen often when cutting your pattern from a single piece of fabric, but when you start your adventures into fabric piecing, depending which method you use, it may happen a bit more often.
The next step is to mark the 1/4 points on the elastic, use the seam as your mark for the back, and the centre front, centre back and side points on your knickers. Before you do this you may want to press the fabric edges with spray starch or best press to prevent it curling if you haven’t already. This will make it easier to keep the fabric in position under the elastic.
When attaching the elastic to the knickers I like to sew with the right side of the knickers facing.
Just a little aside on why I love sewing so much and how it keeps your brain synapses hot and firing. I have been using this technique for over a year now and in my post on attaching the FOE to the leg edge I said for step one the fabric must be face up and I have had to unpick that seam numerous times as I got it the wrong way round. I have just realised when typing that last paragraph that it doesn’t matter which way you have the fabric. Firstly, they are your knickers and you make them how you want. Secondly, if you are using a matching thread you won’t see it any way. To be honest it wouldn’t matter if each leg was different, but that may just be a step too far for my obsessive consistent tendencies to cope with. PS. I have put an update on the original post stating all this if you go back to follow the instructions.
I am still looking for a method that gives me a consistent start to the waist seam. Unfortunately the combination of having to start with minimal stretching and the bulk, however minimal, of the FOE seam means that you can get an over stitched flat spot in the centre back. This is my latest method which has worked well so far.

Fold the FOE in half and press a small section either side of the centre back seam. This will help to control the elastic when placing it under the foot.
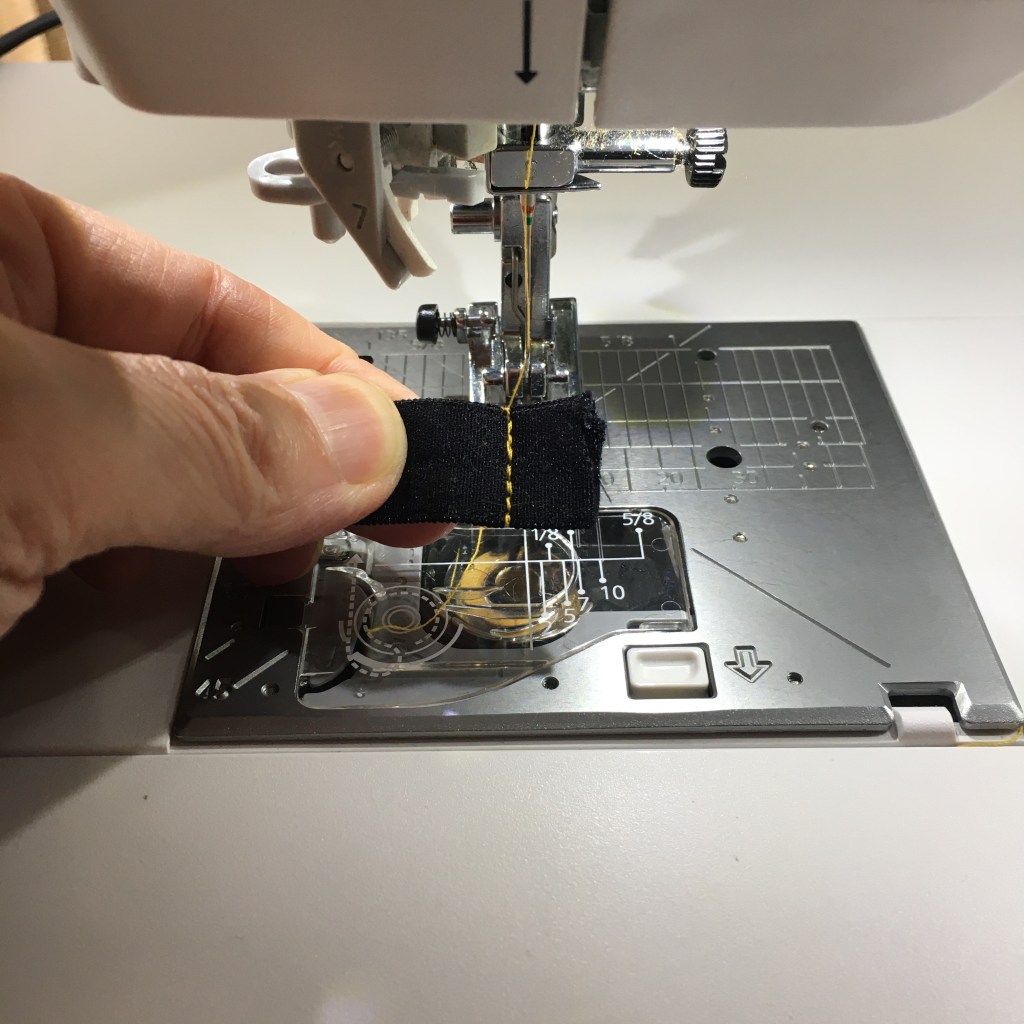
Position the fabric inside the FOE matching the seam and the centre back on the knickers. To keep the fabric in place pin to the lower FOE with the point away from the centre. This will allow you to keep the pin in place while you do a few securing stitches. Don’t forget to then remove the pin from the inside so you don’t hit it and break your needle.
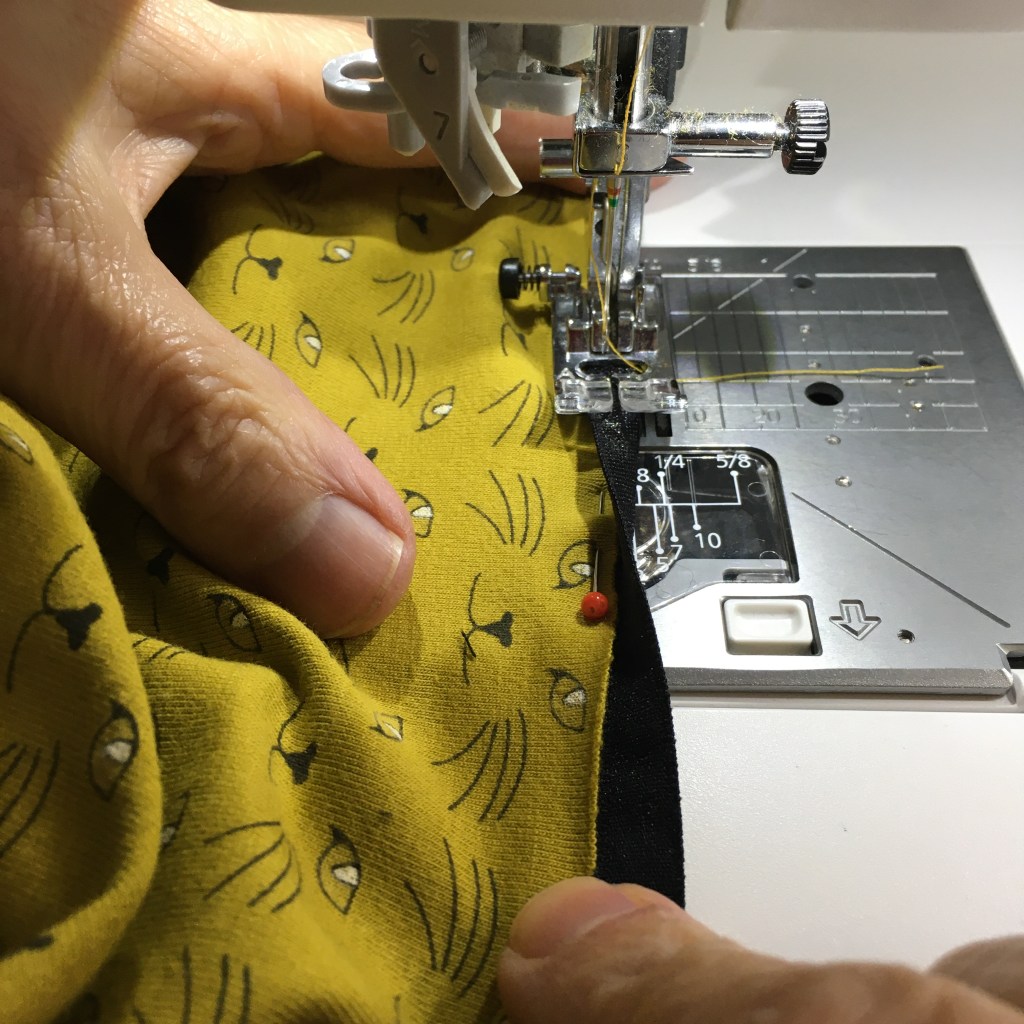
Straighten the fabric and FOE behind the machine and sew a few stitches without stretching the elastic to secure fabric and FOE together. Then while stretching the elastic to match the fabric at the side seam, start sewing. On my Juki NX7 I use the same stitch as on the second pass on the legs, stitch #20 and a starting width of 3.4 and length of 1.0, making sure you have tested it out on spare piece of FOE before hand.
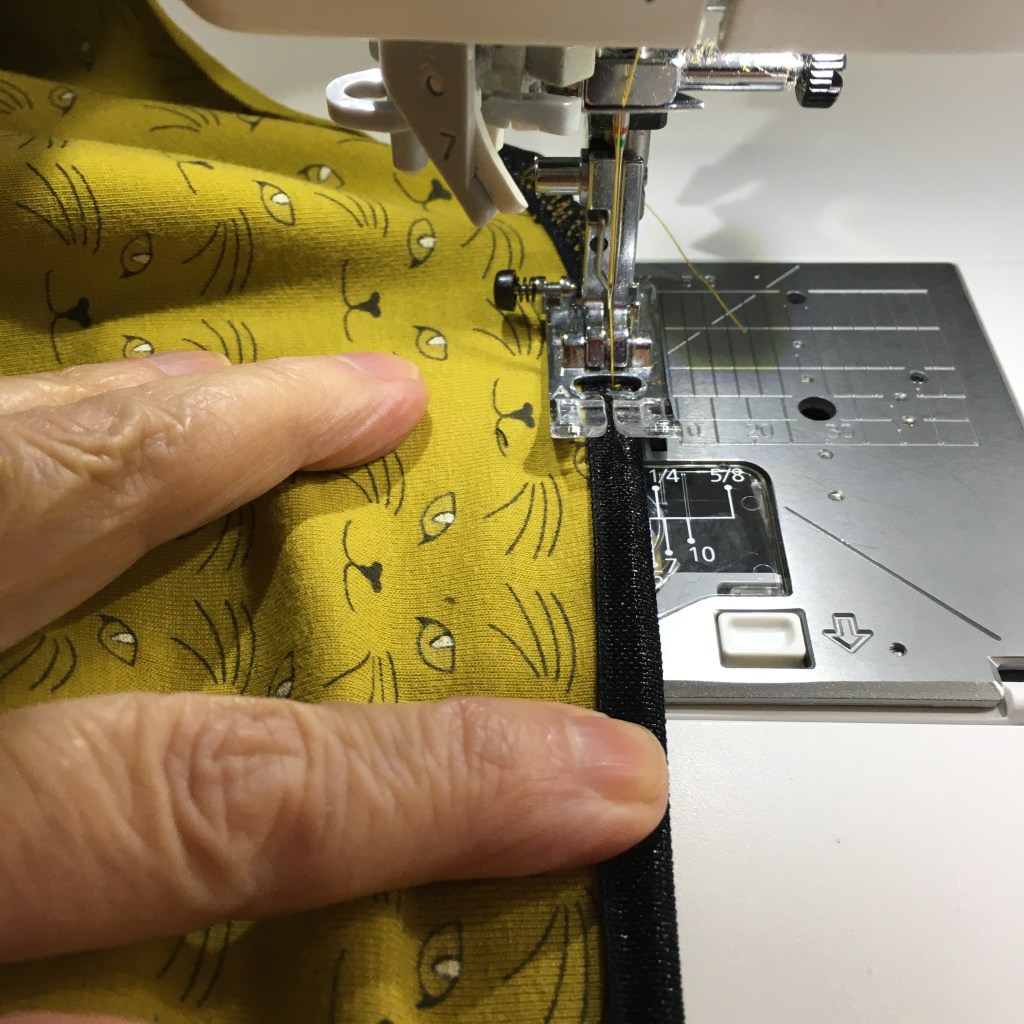
Once you have sewn past the seam, you will be able to release the fabric behind the machine and concentrate on positioning the fabric and folding the FOE. If your machine struggles to feed the fabric through if you are pulling against the elastic, you will need to pin the elastic and fabric in place before sewing so you can encourage the fabric from behind at the same time to guide it through.

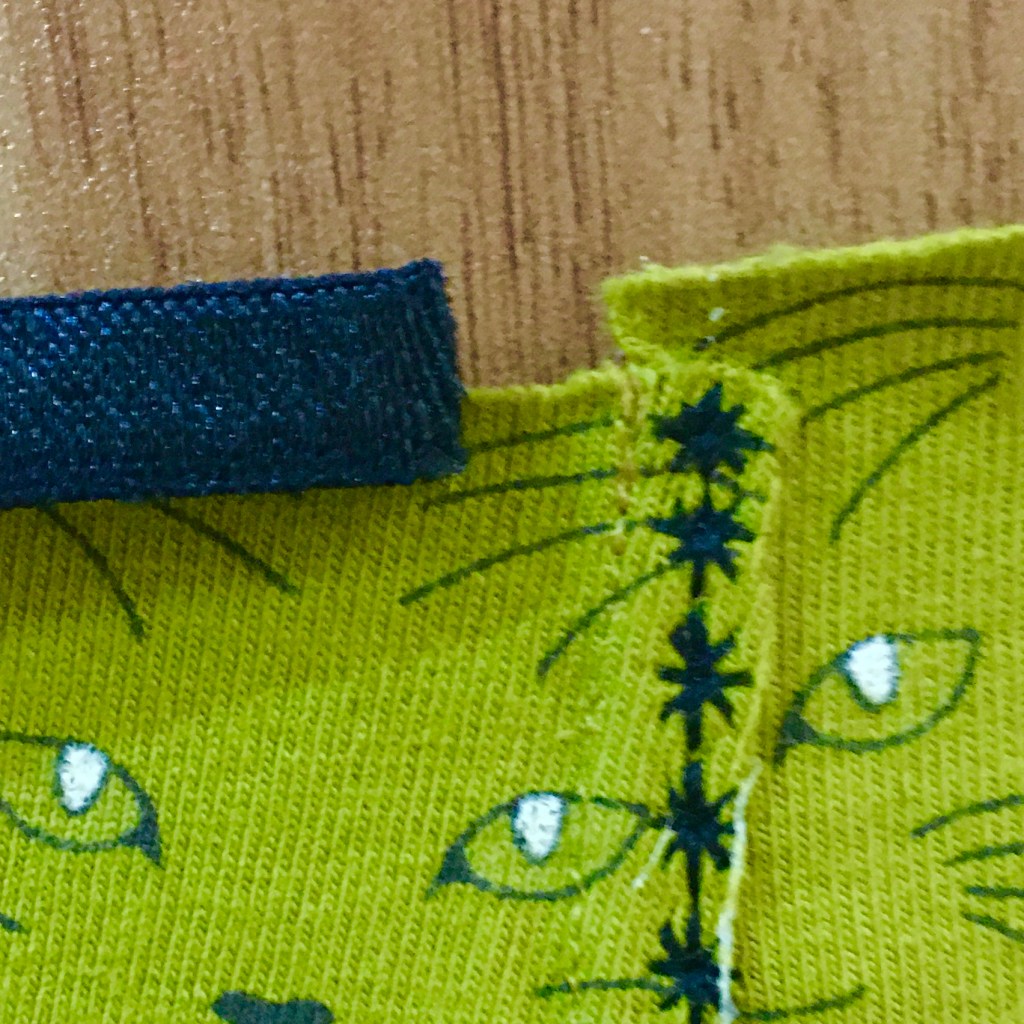
Remember to blend in the side seam where the edges are not spot on when attaching the waist elastic.
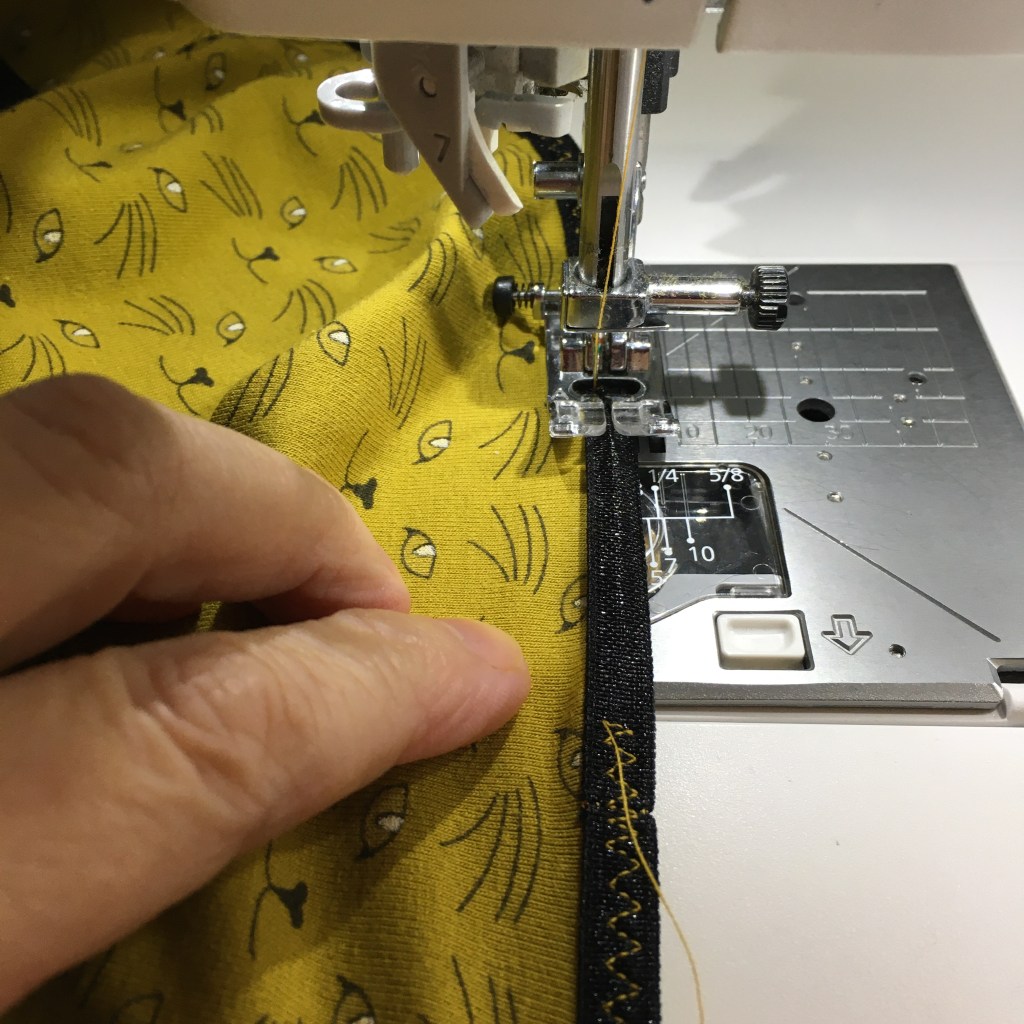
Overlap the stitching at the centre back for just a few stitches so as not to create too solid an area.

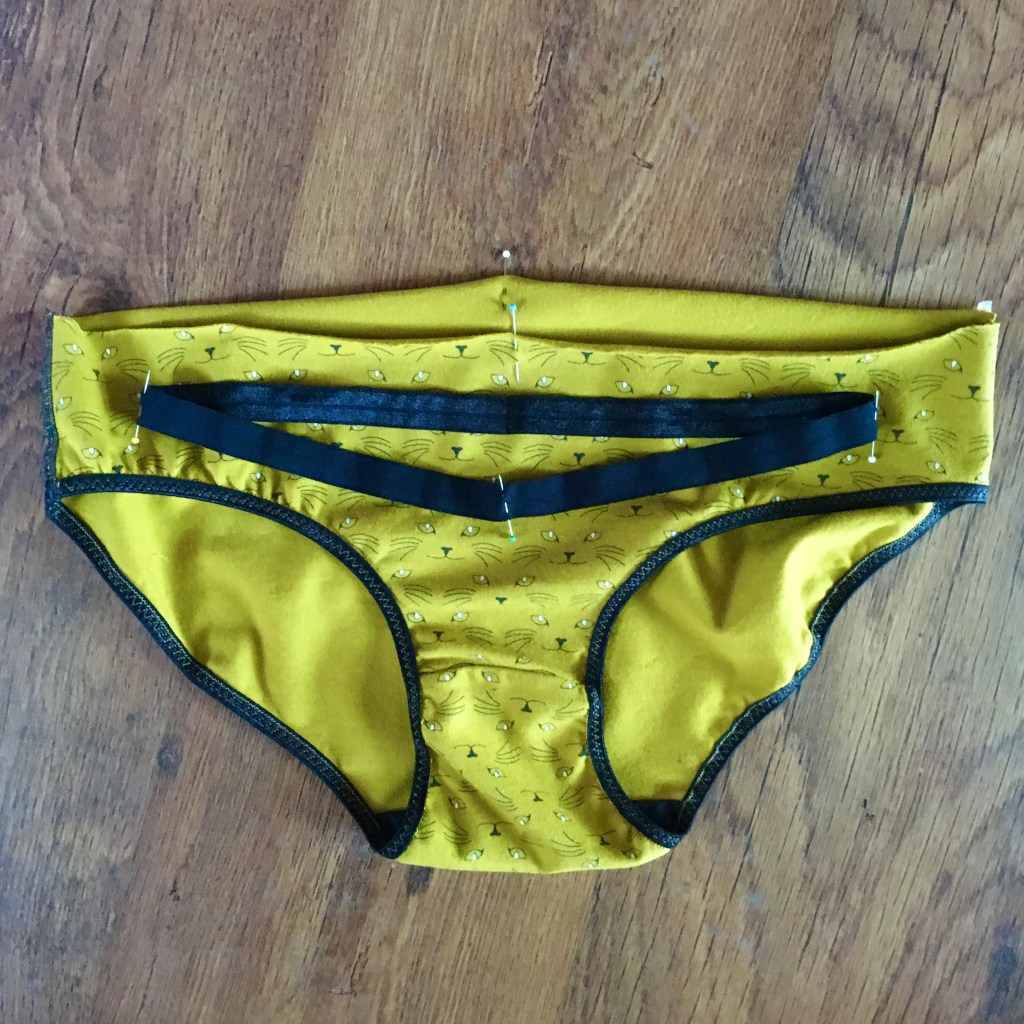
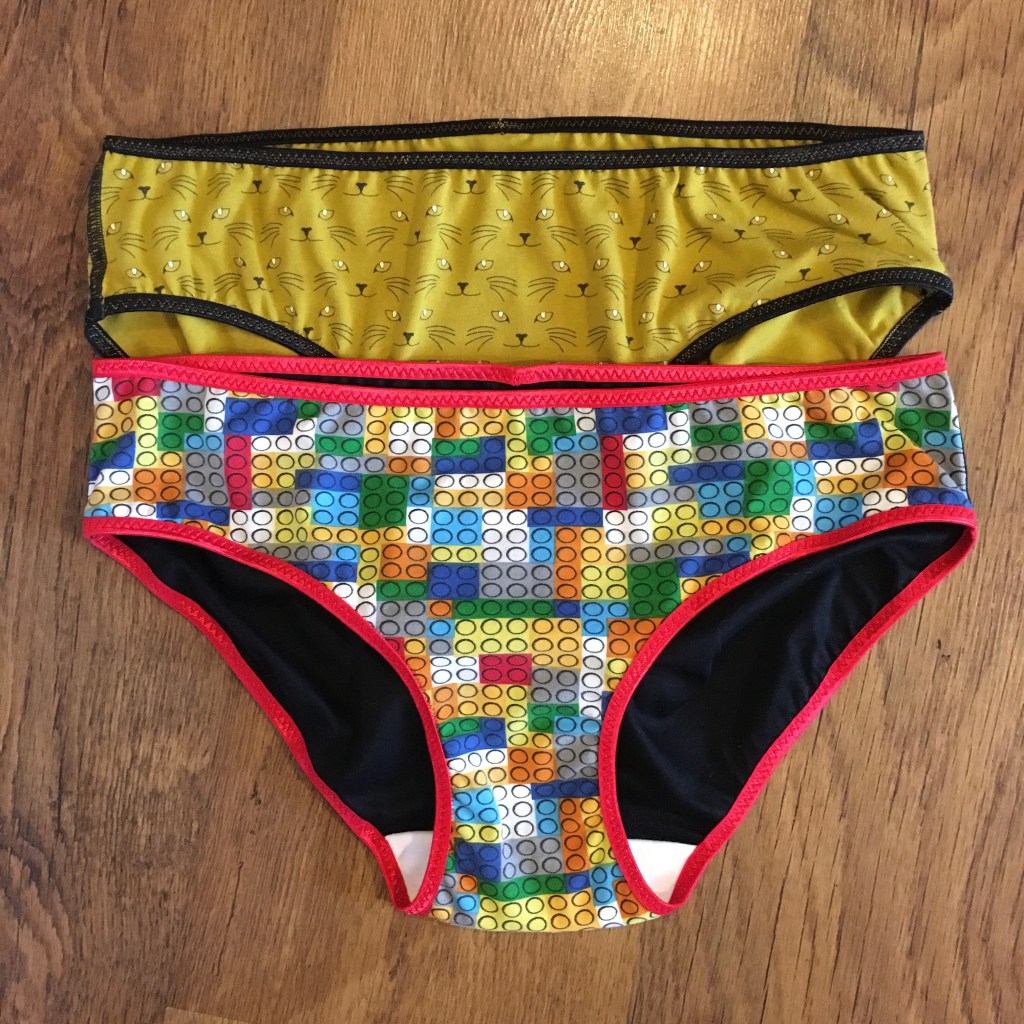
And there you have it, your knickers are completed.
Next up: A few ideas and free patterns to get you started.
