
I may have mentioned this before, possibly more than once, but I do love sewing with stretch fabric and because of this love I treated myself to the Juki MCS-1800 coverstitch machine. As with all Jukis I have found this machine a joy to work with and it produces a stitch of outstanding quality.
The machine comes with a hem guide as standard, which I think is brilliant as you don’t have to decided if it is worth the extra money to buy one. In this blog I am going to go through how I use it and as there will be times that you need a larger hem then the seam guide allows, my preferred way of cover stitching without it.

The guide is used for hems from 1/2“-7/8“ or 15 – 23 mm and is designed so that an even hem, with precise edge coverage, can be created without any preparation of the fabric.

However, being a very cautious person, I like to prepare my garment by ironing the hem in place before I cover stitch. This is helpful if, for instance, I have managed to get my fabric slightly off grain or if the hem is designed to be angled, as the guide does like to move the fabric in a straight line. With the hem being pressed you not only have a physical indication of the fold so any problems become obvious very quickly, but I find that the fabric does feed through the seam guide more easily.

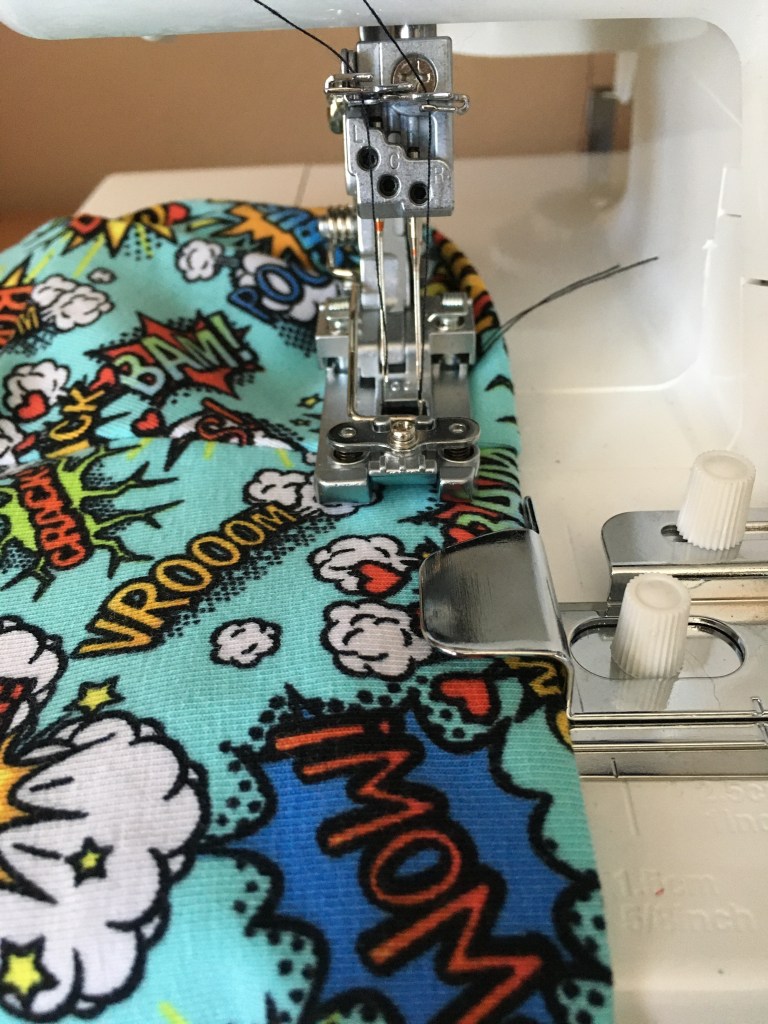
Before I start talking about the method let me go through the different parts of the hem guide so you can understand exact what is going on.
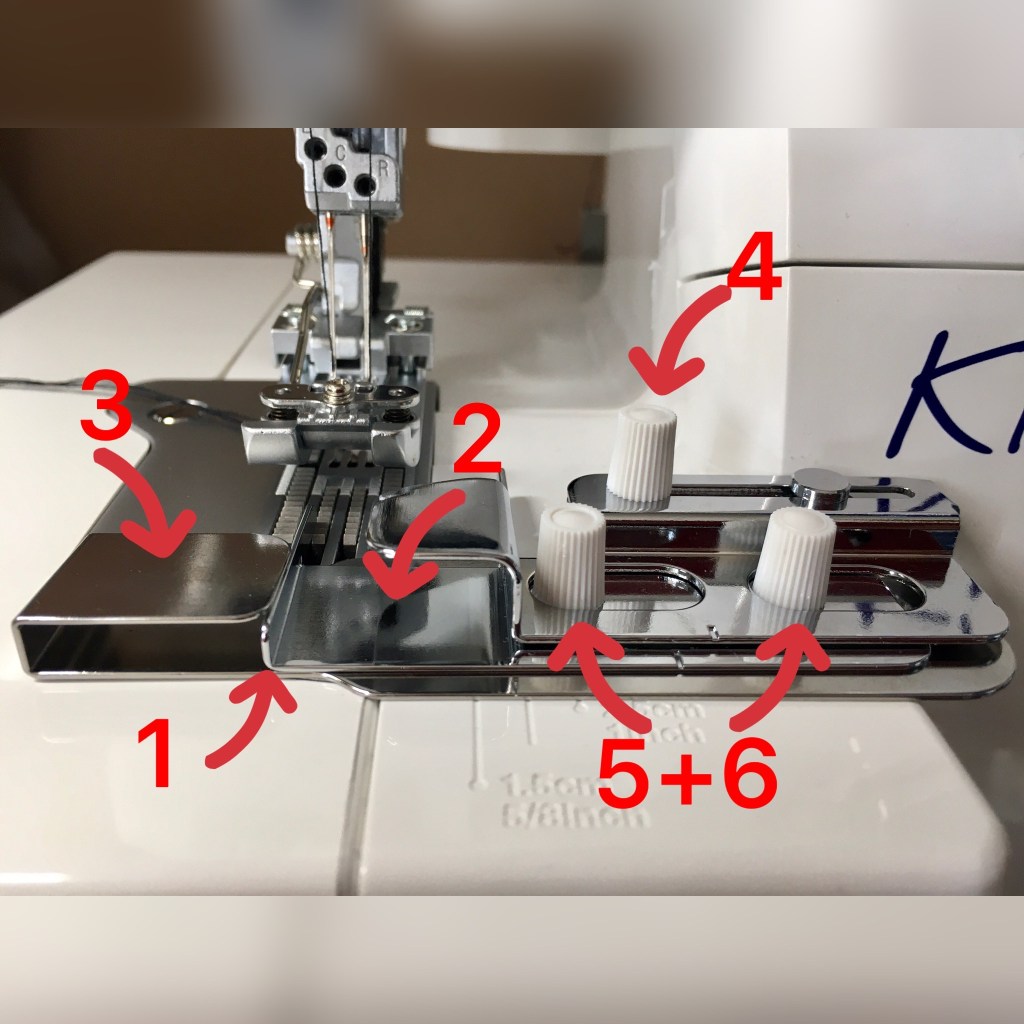
1. Cut Edge Guide – this guide can not be moved. It is set up so that the left cover stitch needle will just miss the edge of the hem, approximately 1mm to the left, and only goes in to the single layer of fabric. This means that the edge will be completely encased by the thread.
2. Outer Folded Edge Guide – So in other words the bottom of your hem. The position of this is moved in relation to the needles to increase or decrease the width of your hem. The screw at the top of the guide – No 4 – is used to make adjustments.
3. Cloth Guide – otherwise known as “the bit that keeps the bottom of the hem against the Outer Fold Over Edge Guide”. I don’t think there is much else that I can say about this except that it is adjusted by the 2 lower screws – No 5 and 6.

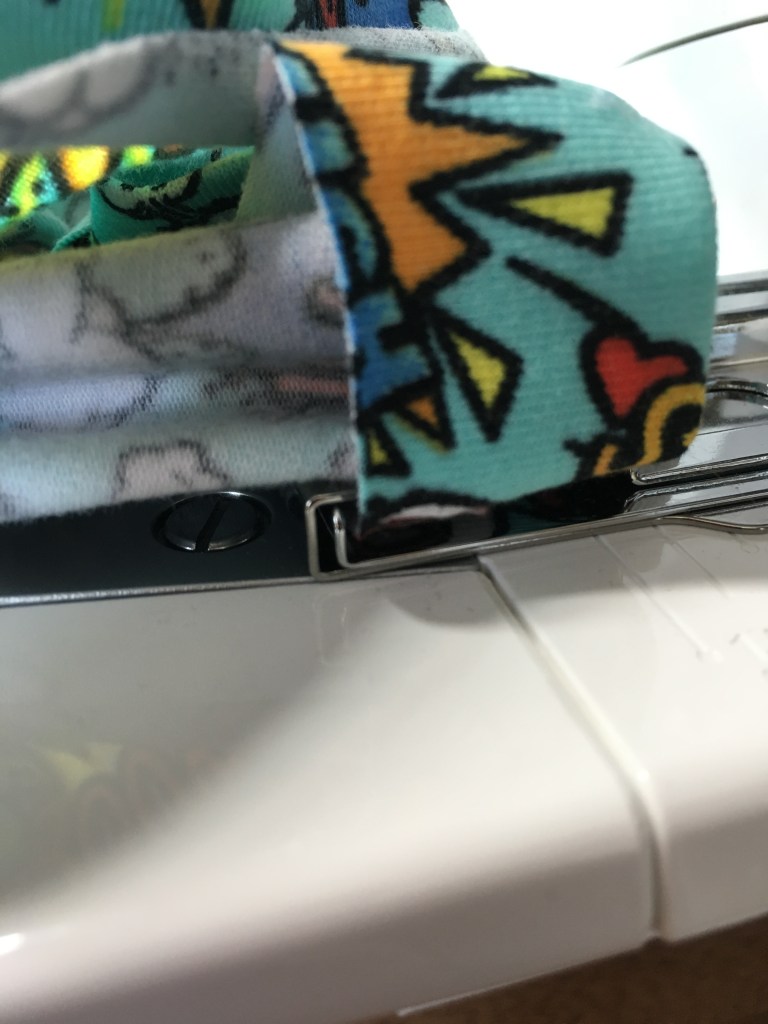
To use the Hemmer Guide firstly set the Outer Folded Edge Guide to the width of your hem and move the Cloth Guide over to the left out of the way. Lay your fabric in to the guide with the area that you want to start stitching under the needle.

Move the Cloth Guide over to the right by lifting the fabric so you can see the guide and pushing it in to position between the fabric and the hem. Secure in place with the two screws. You are now ready to cover stitch the hem.
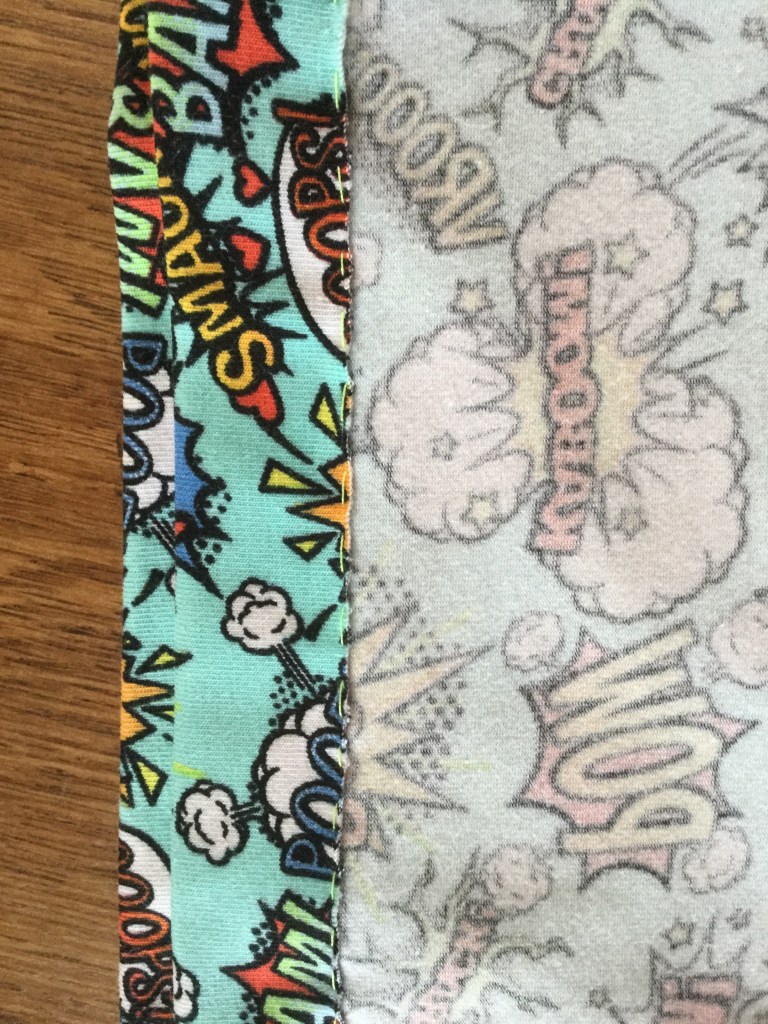
Keep an eye on your pressed edge, which will ensure that the hem is feeding through straight and when you are sewing over a seam go a little slower and ensure the seam allowance is laying in the correct direction.
When working in the round you will get to the point when the cover stitched area gets back to the seam guide. This will not go back through the guide with the Cloth Guide in place. When you get to this point, loosen the screws holding the Cloth Guide in place and push it back to the left out of the way. You can now complete your stitching.

One little tip I have for when you get to this point is to move the two threads on top of your work to the sides. I always sew these threads through to the back and tie them off when I have finished sewing. By moving them out of the way you prevent them being caught up in the overlapping stitching.
The final thing to note and this is not applicable to all machines, is the method of releasing the thread when you have finished cover stitching. Turn the hand wheel till the needles are in the lowest position. Then, and this is the bit that freaked me out a little as it is counter intuitive and normally a no no, raise the needle to its highest position by turning the hand wheel BACKWARDS. Remove your work from the machine while holding on to the fabric and the end stitches to ensure nothing unravels. Sew your threads through and knot them all off.


However, there may be occasions when you want to have a hem that is wider than 7/8“/23mm or one that is decorative or possibly uneven. That is where my second method of hemming which does not use the hemming guide is useful. For this method I press the seam and tack the hem 1mm or as close as possible to the raw edge.
Then when I am sewing I ensure that the needles are placed either side of this tacking line.


I hope you agree that both these methods produce a consistant cover stitch hem and maybe one day you may consider adding one to your sewing machine arsenal.

Sewing rulers are available in Metric or Imperial versions from my fellow Bee and friend Jen @jenerates and can be bought on her website Www.jenhogg.co.uk

Thats a very clear description of how to use tis mysterious piece of equipment. I have one for my MCS1500 but it came without instructions. You have solved that dilemma.
One additional thing that I have found extremely helpful is to serge the edge to be coverstitched first. I find I can then pin and press it in place and I can feel the edge well enough to guide it between the needles to get a good finish. As I have invariably used my serger to construct the garment it is threaded up with the correct colour already.
LikeLike
I bought one for my old cover stitch machine and was completely bamboozled by it. I have found this one so much easier to work with.
I will have to try serging it first Janet, it doesn’t add too much bulk to the seam does it?
LikeLike
Thank you! I don’t have a hem guide, but I was just thinking that tacking might be the way to go to get the hem done (without using winder tape and then trimming), so thanks for providing me this very clear way of doing it 🙂 Will try this evening!
LikeLike
Glad you found my blog useful. How did your cover stitching go?
LikeLike
You have made something which normally ‘does my head in’ completely clear and understandable. Thank you so much. 👏🏻 👏🏻
LikeLike
Jayne, thank you. I am so glad I have been of help. Enjoy your cover stitching 😁
LikeLike